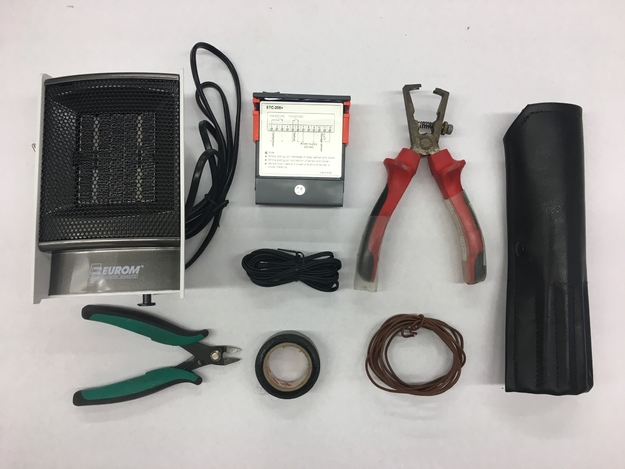
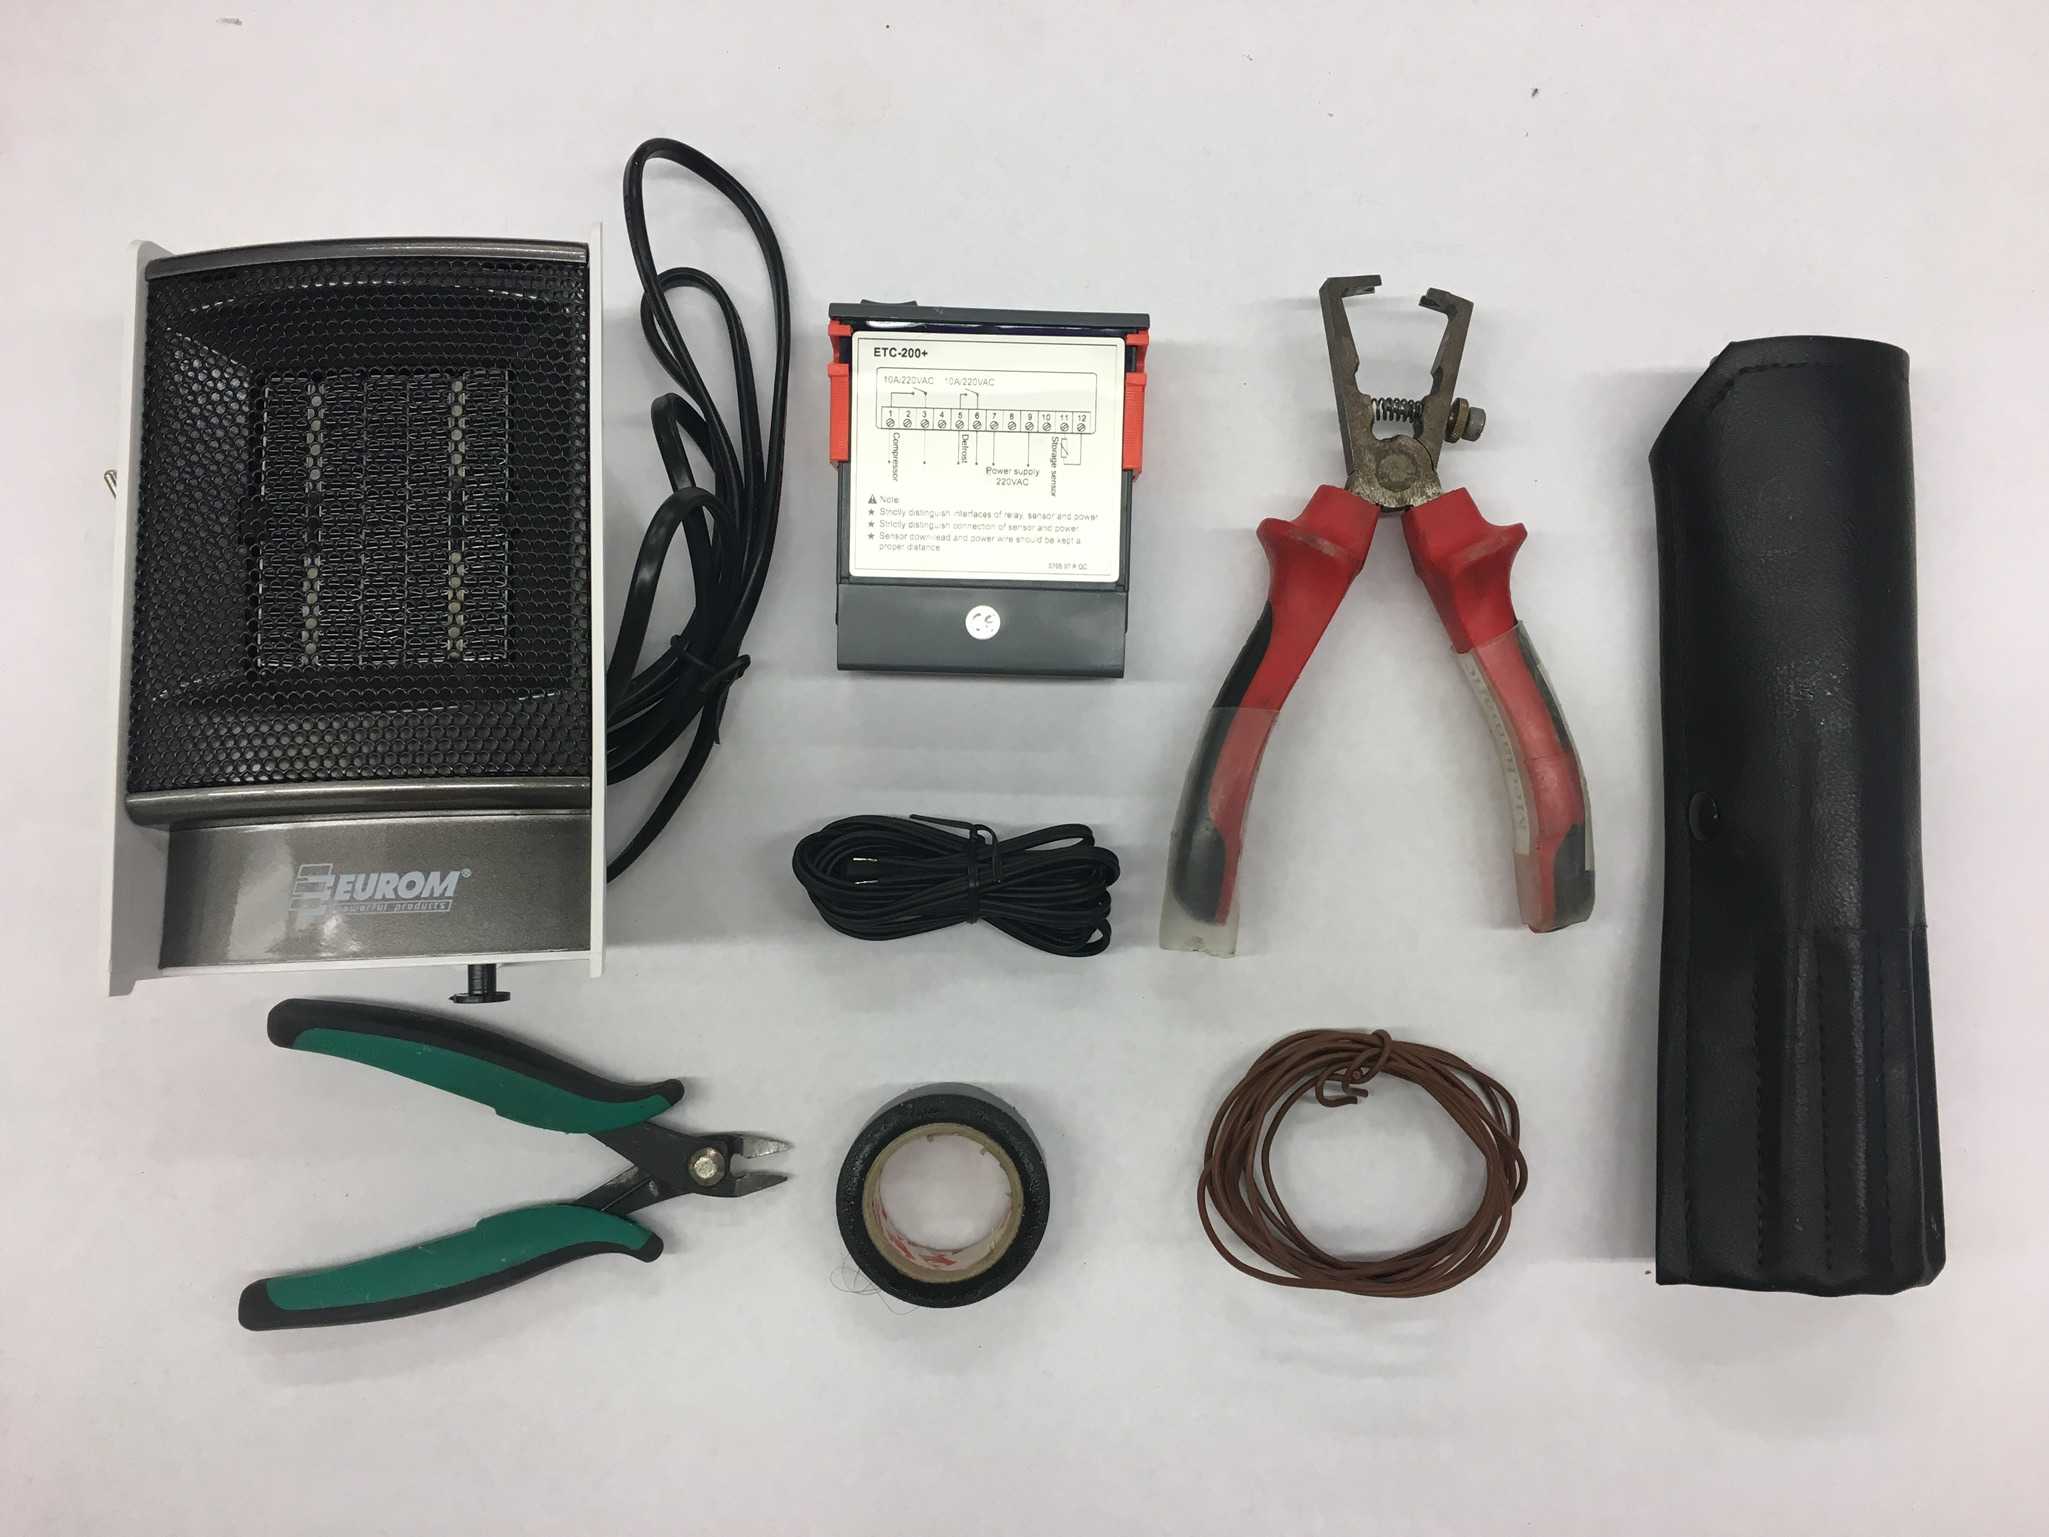
You will need:
1 Eurom Safe-t-Heater mini 500
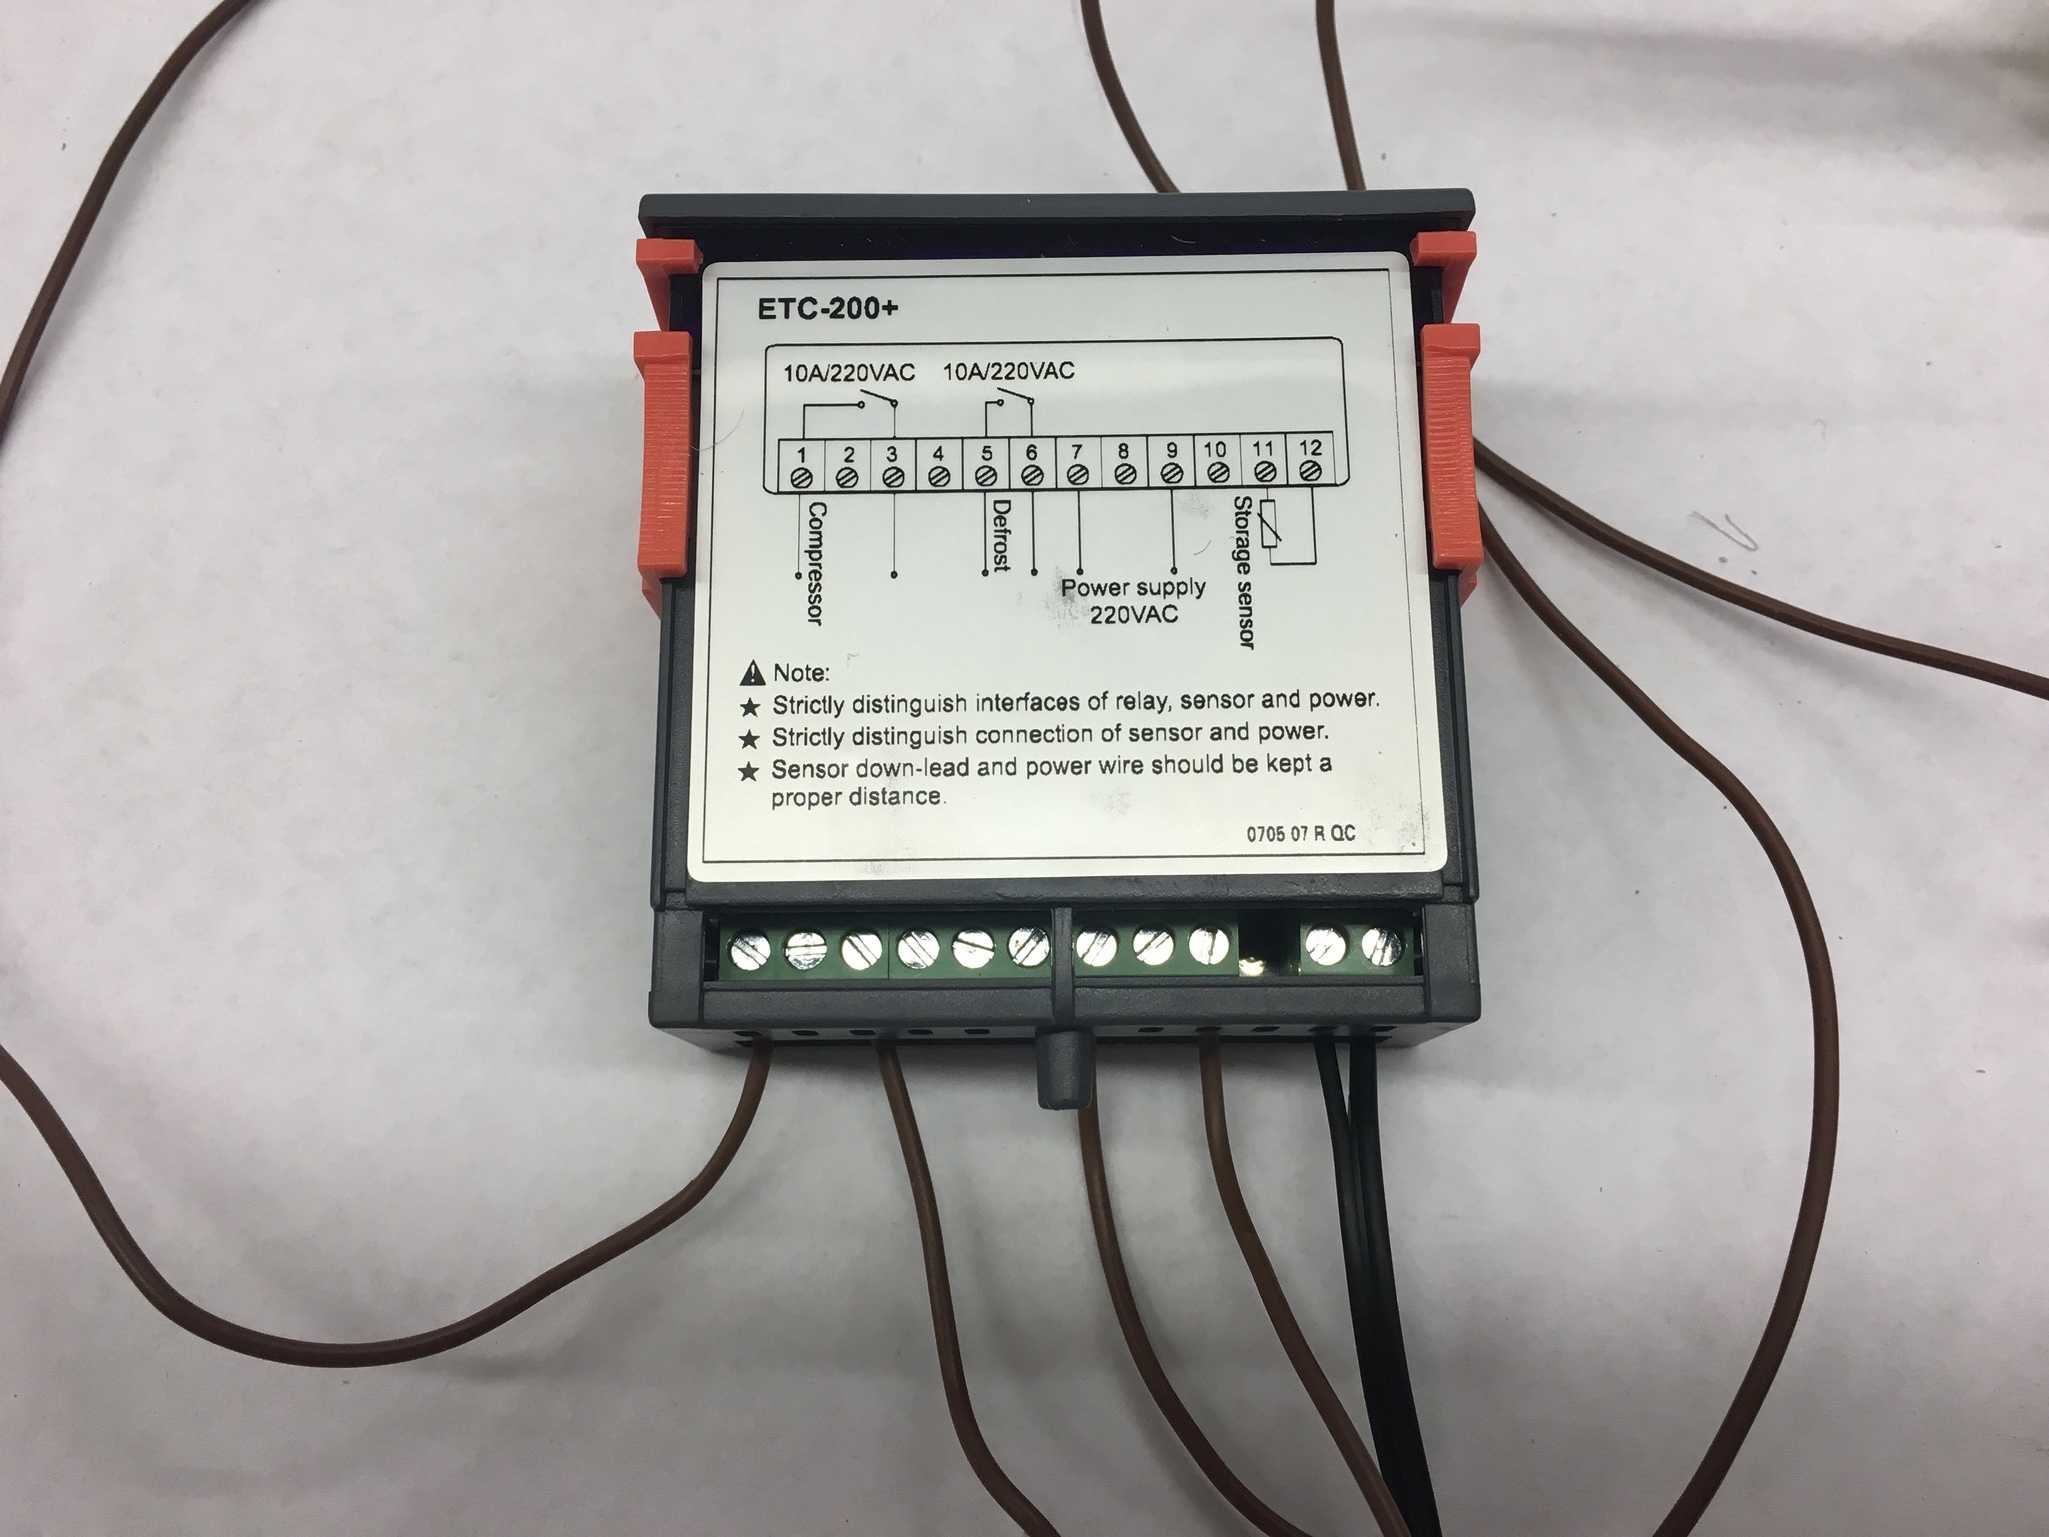
Microcomputer temperature controller, Model ETC-200+ (with temperature sensor!)
Wire
Wire stripper
Wire cutter
Screwdrivers (+ and –)
Isolation tape
Step by step:
1. Decide where you will place the heater, and where you’ll place the thermostat, and what length the wires going from one to the other will need to be.
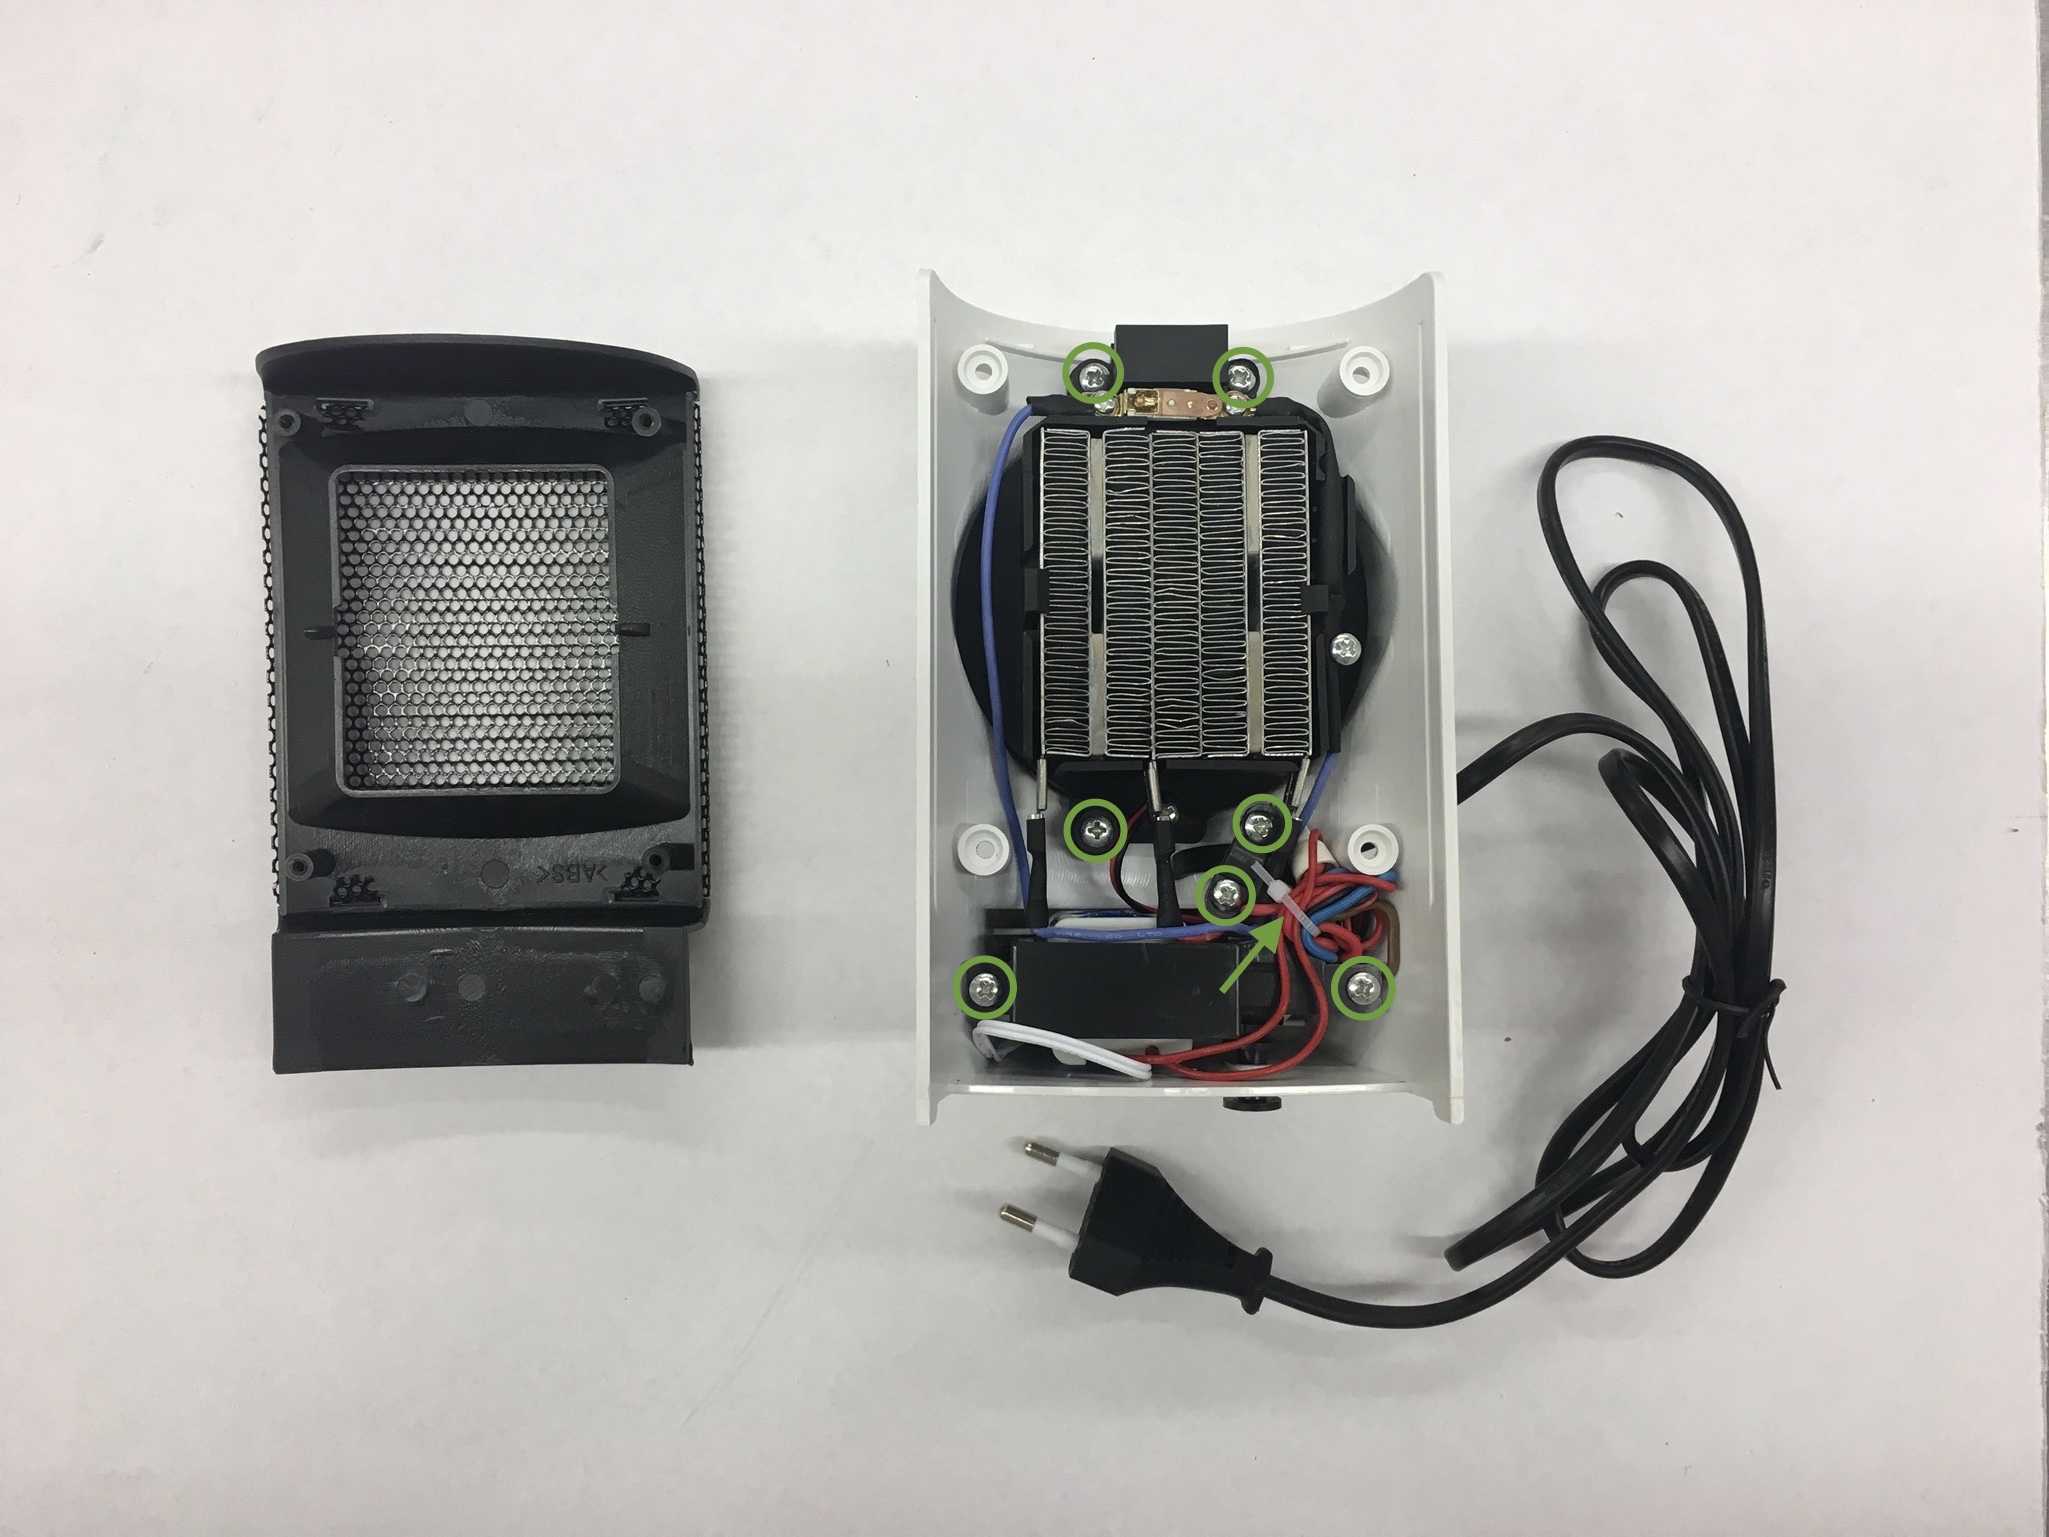
2. Unscrew the back of the heater
3. Unscrew all of these screws, remove the plastic bracket and cut the tie-wrap.
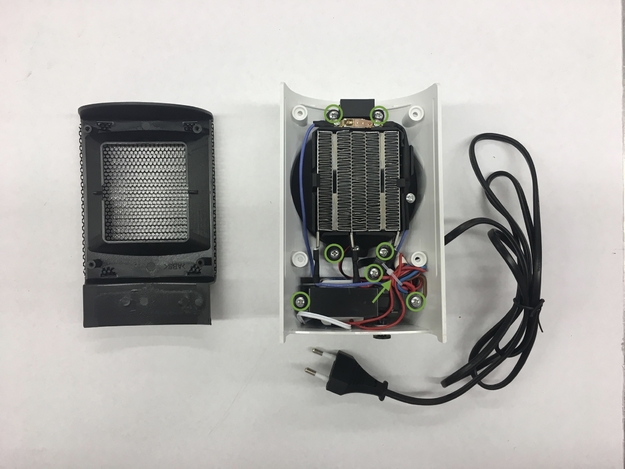
4. You can now take everything out to give yourself some more space to work.
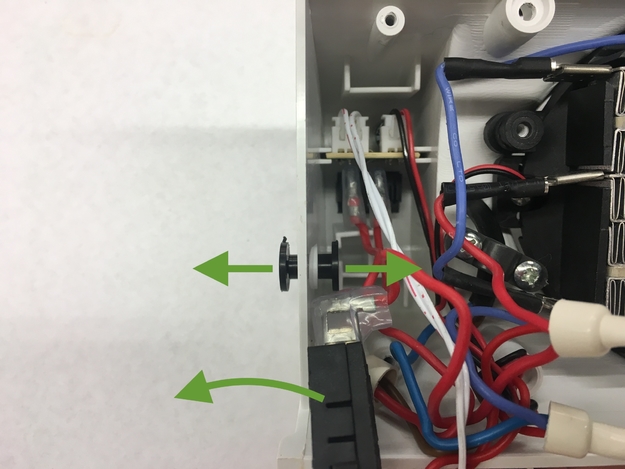
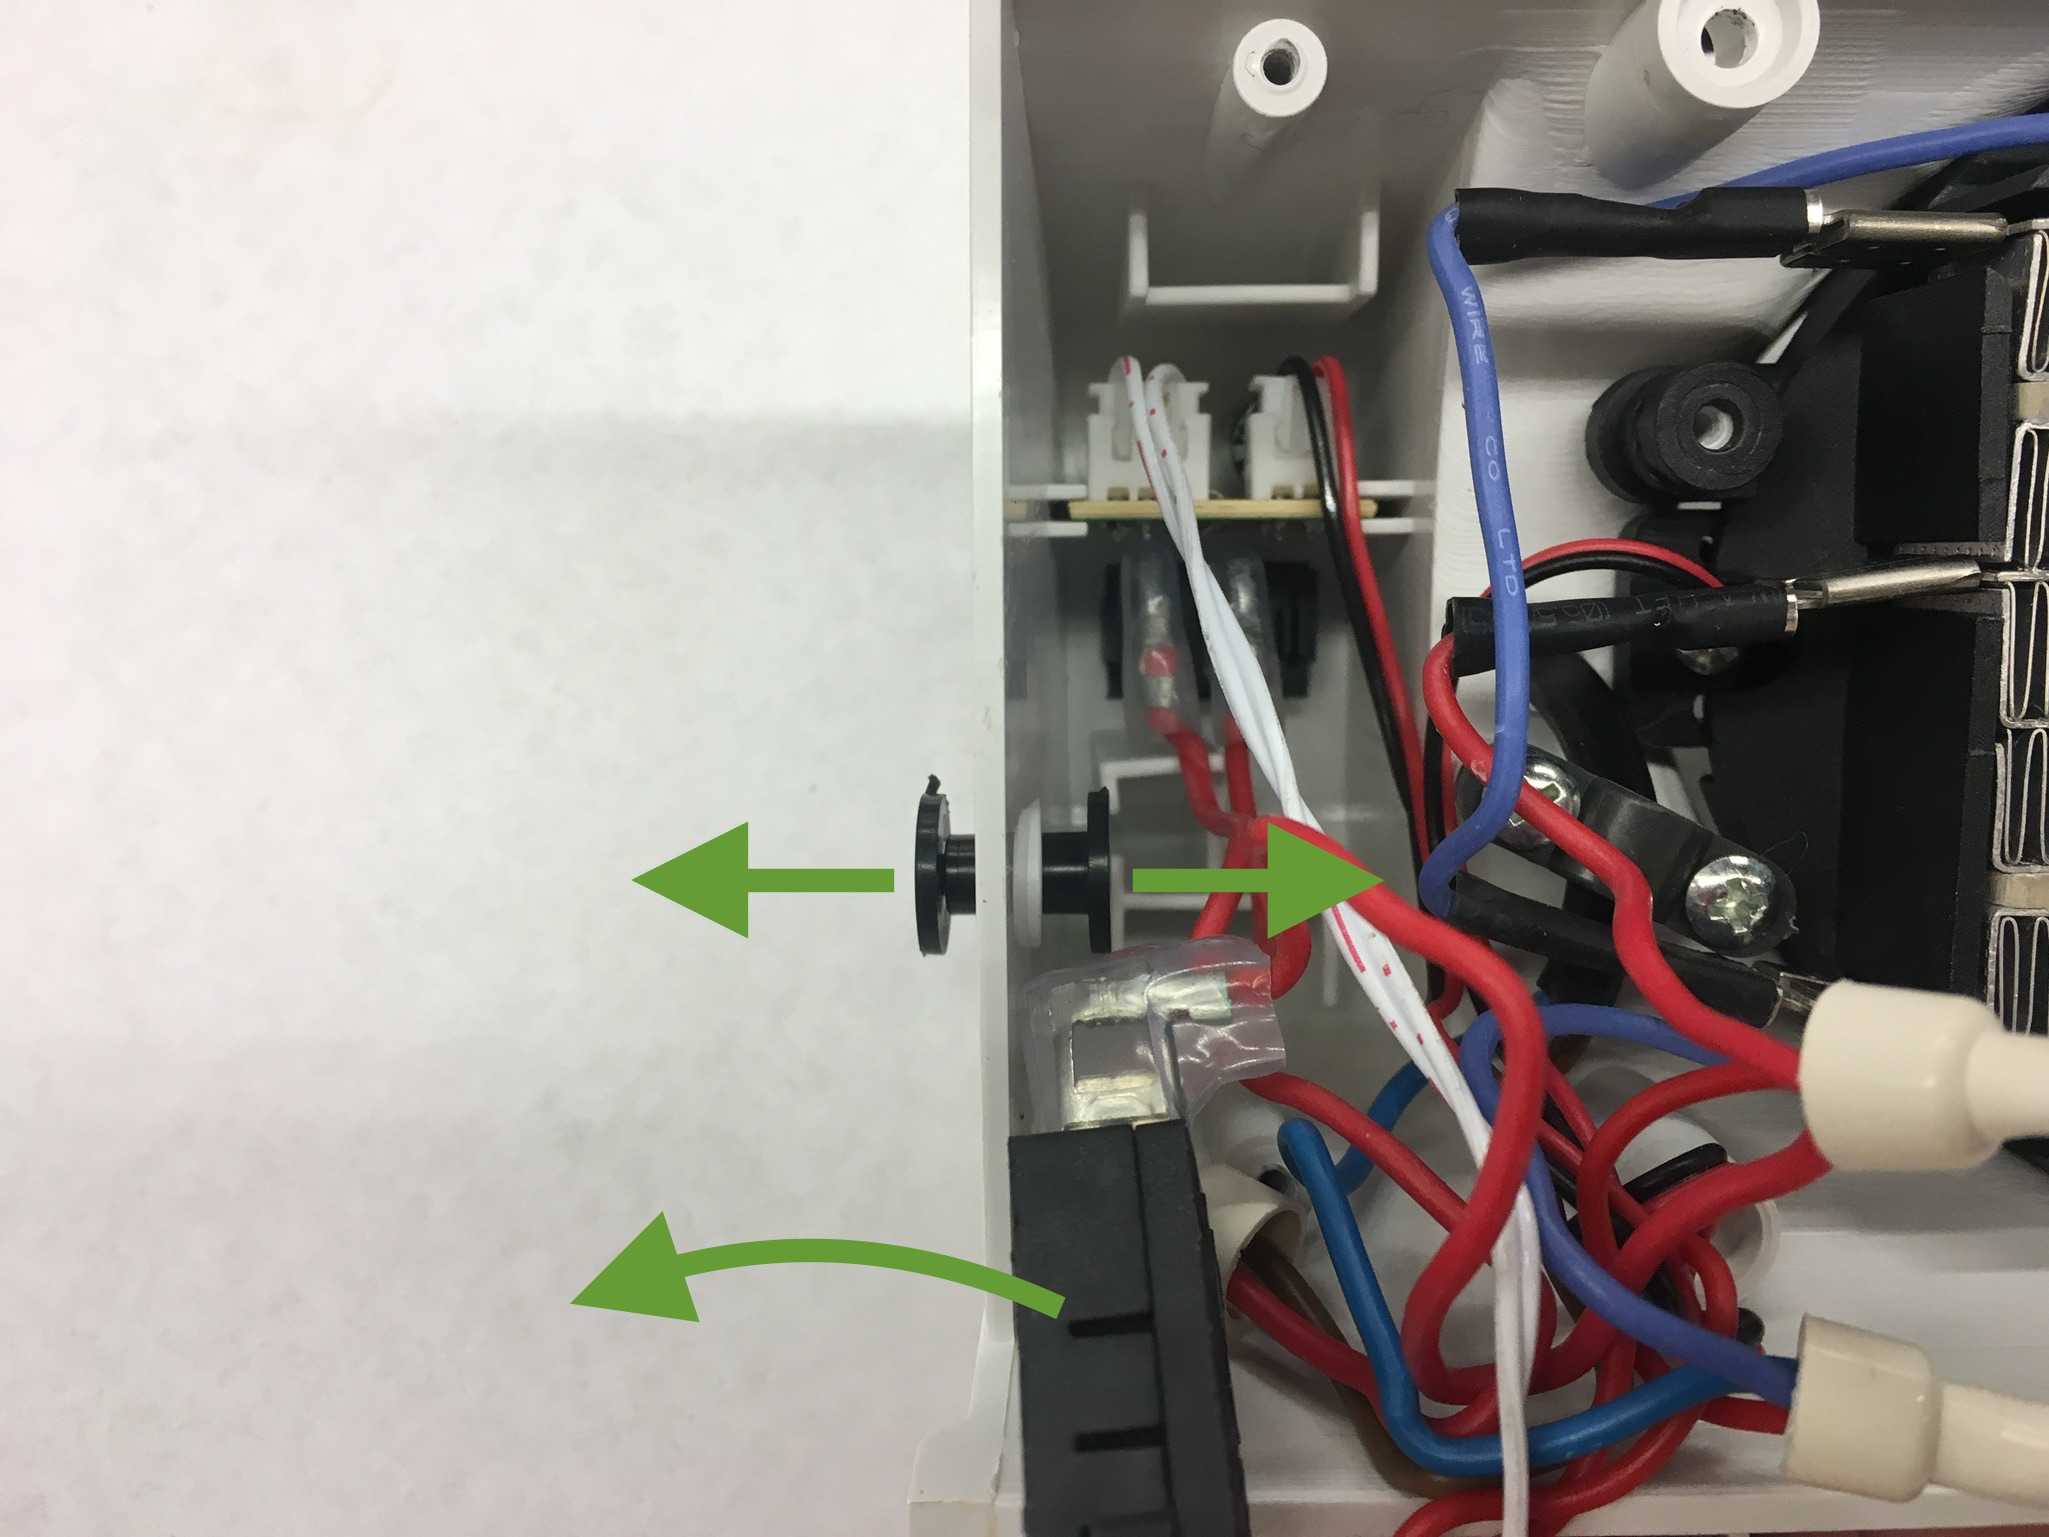
5. Remove the plastic button.
6. Cut the wires connected to the pushbutton, strip their ends and fold them together to connect. Now wrap them in isolation tape. No metal should be showing.
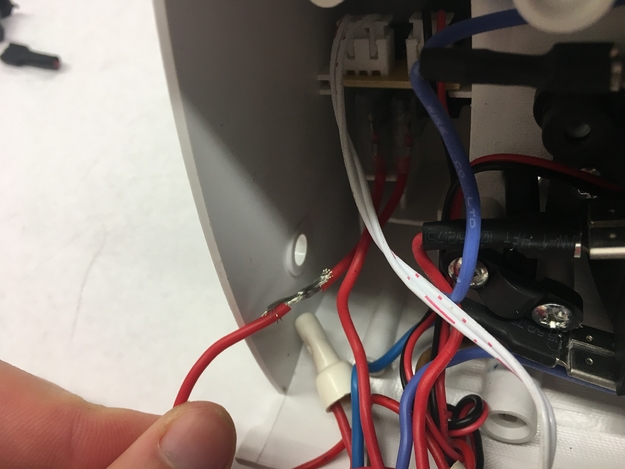
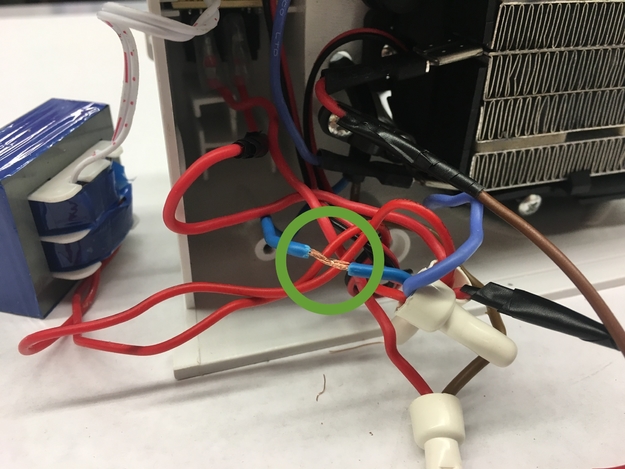
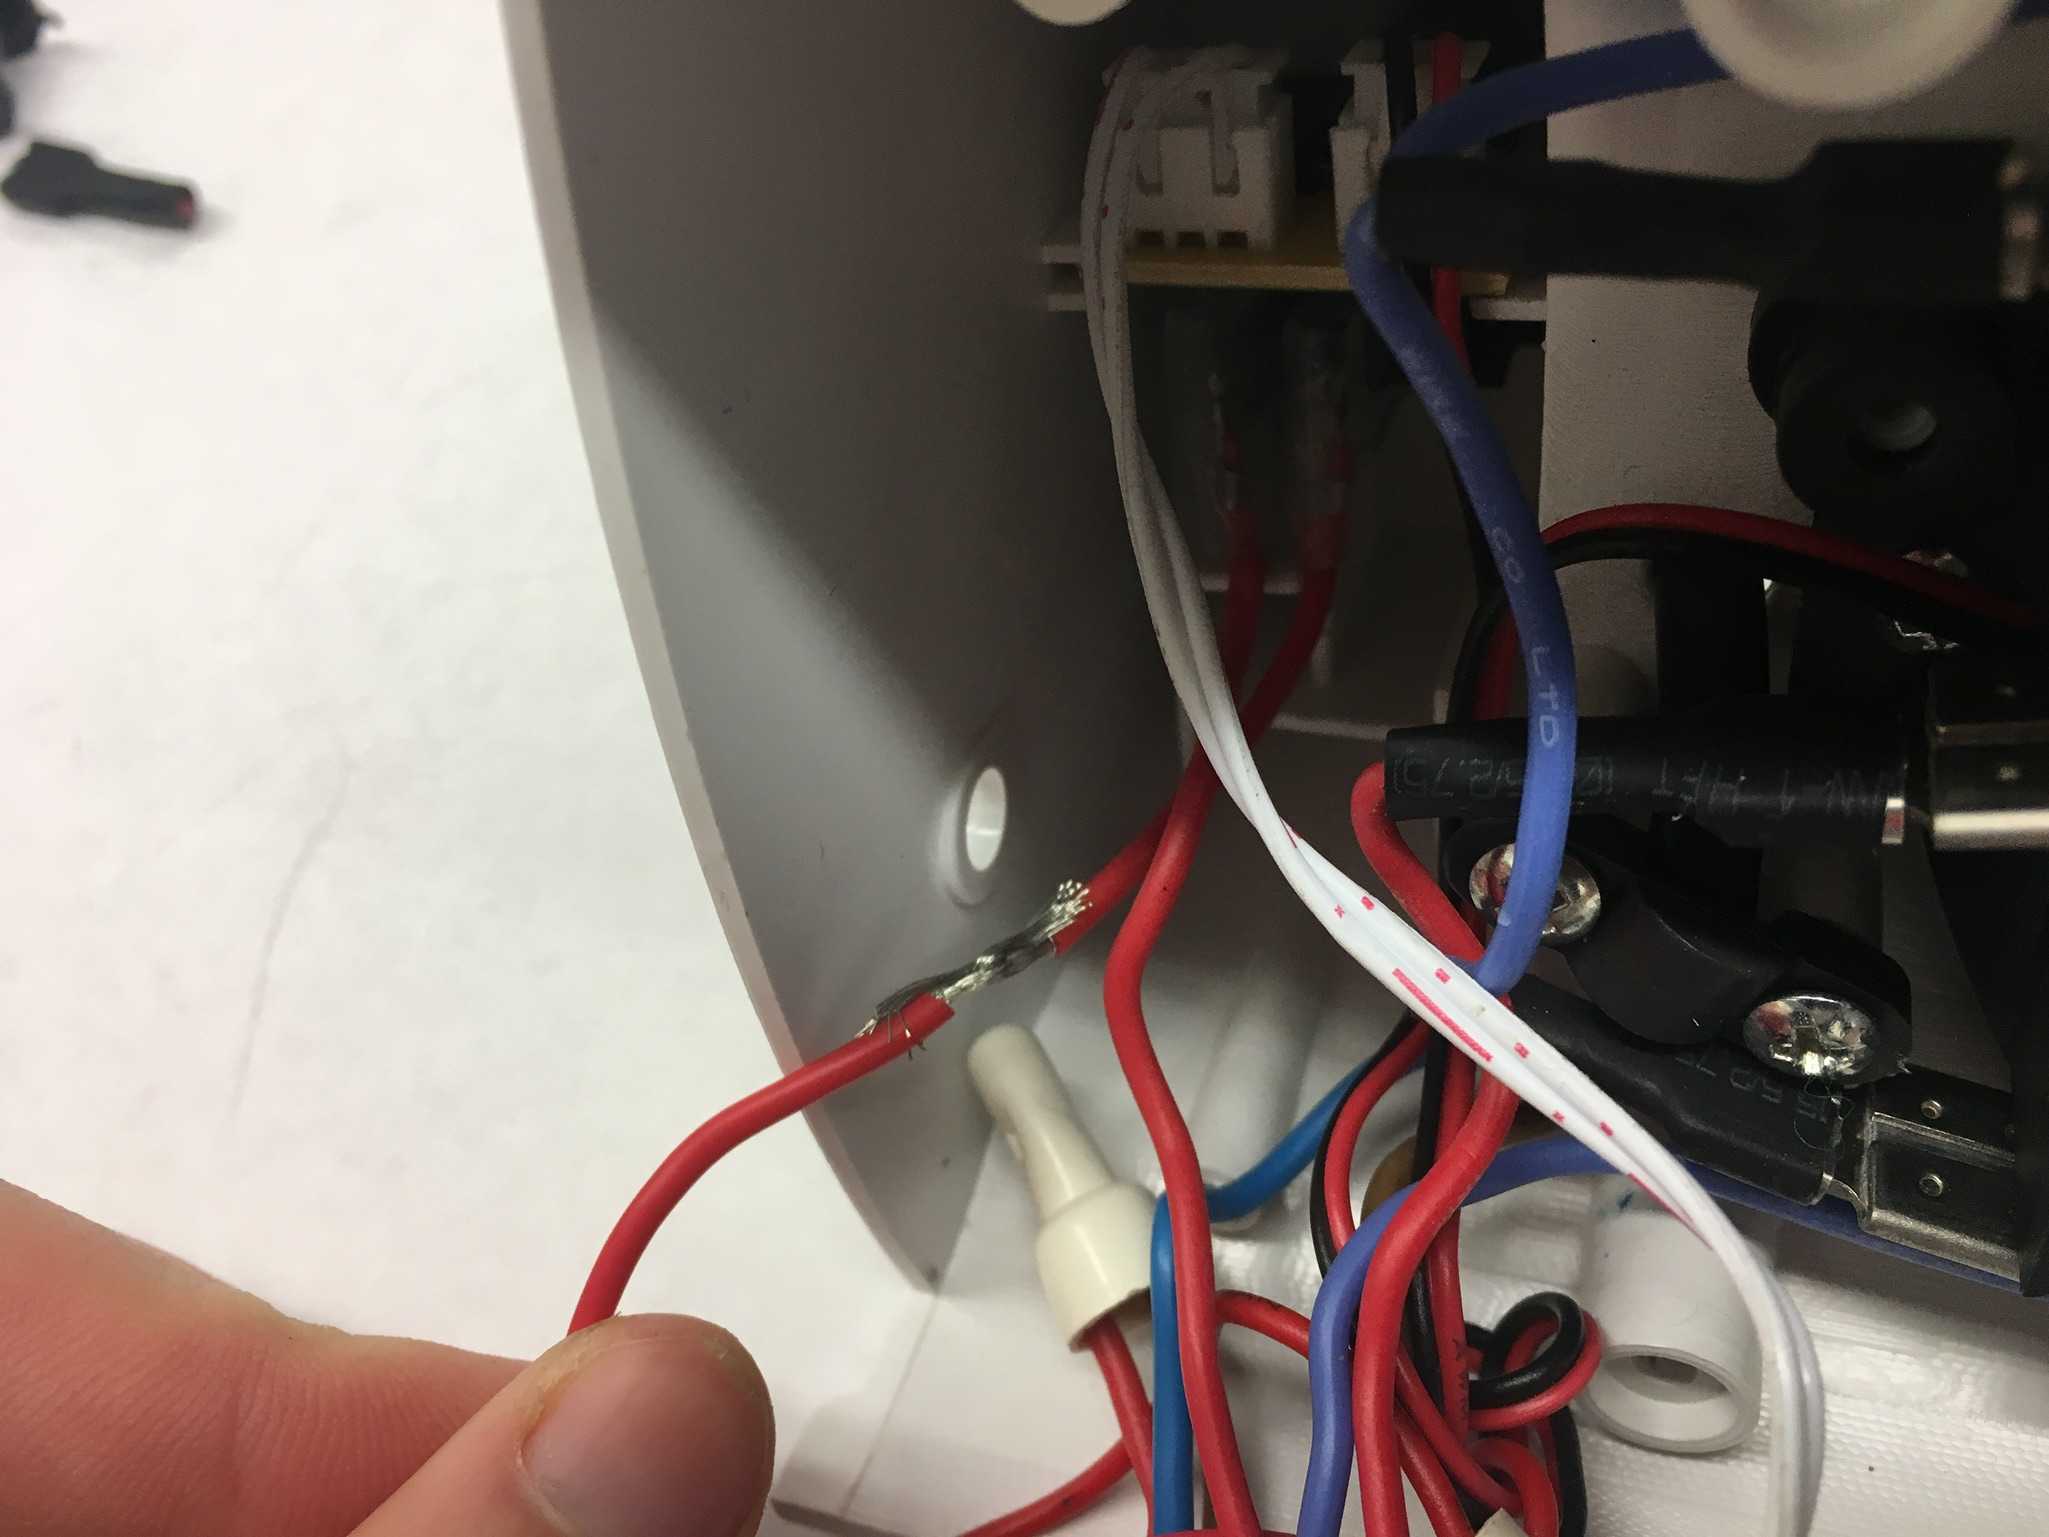
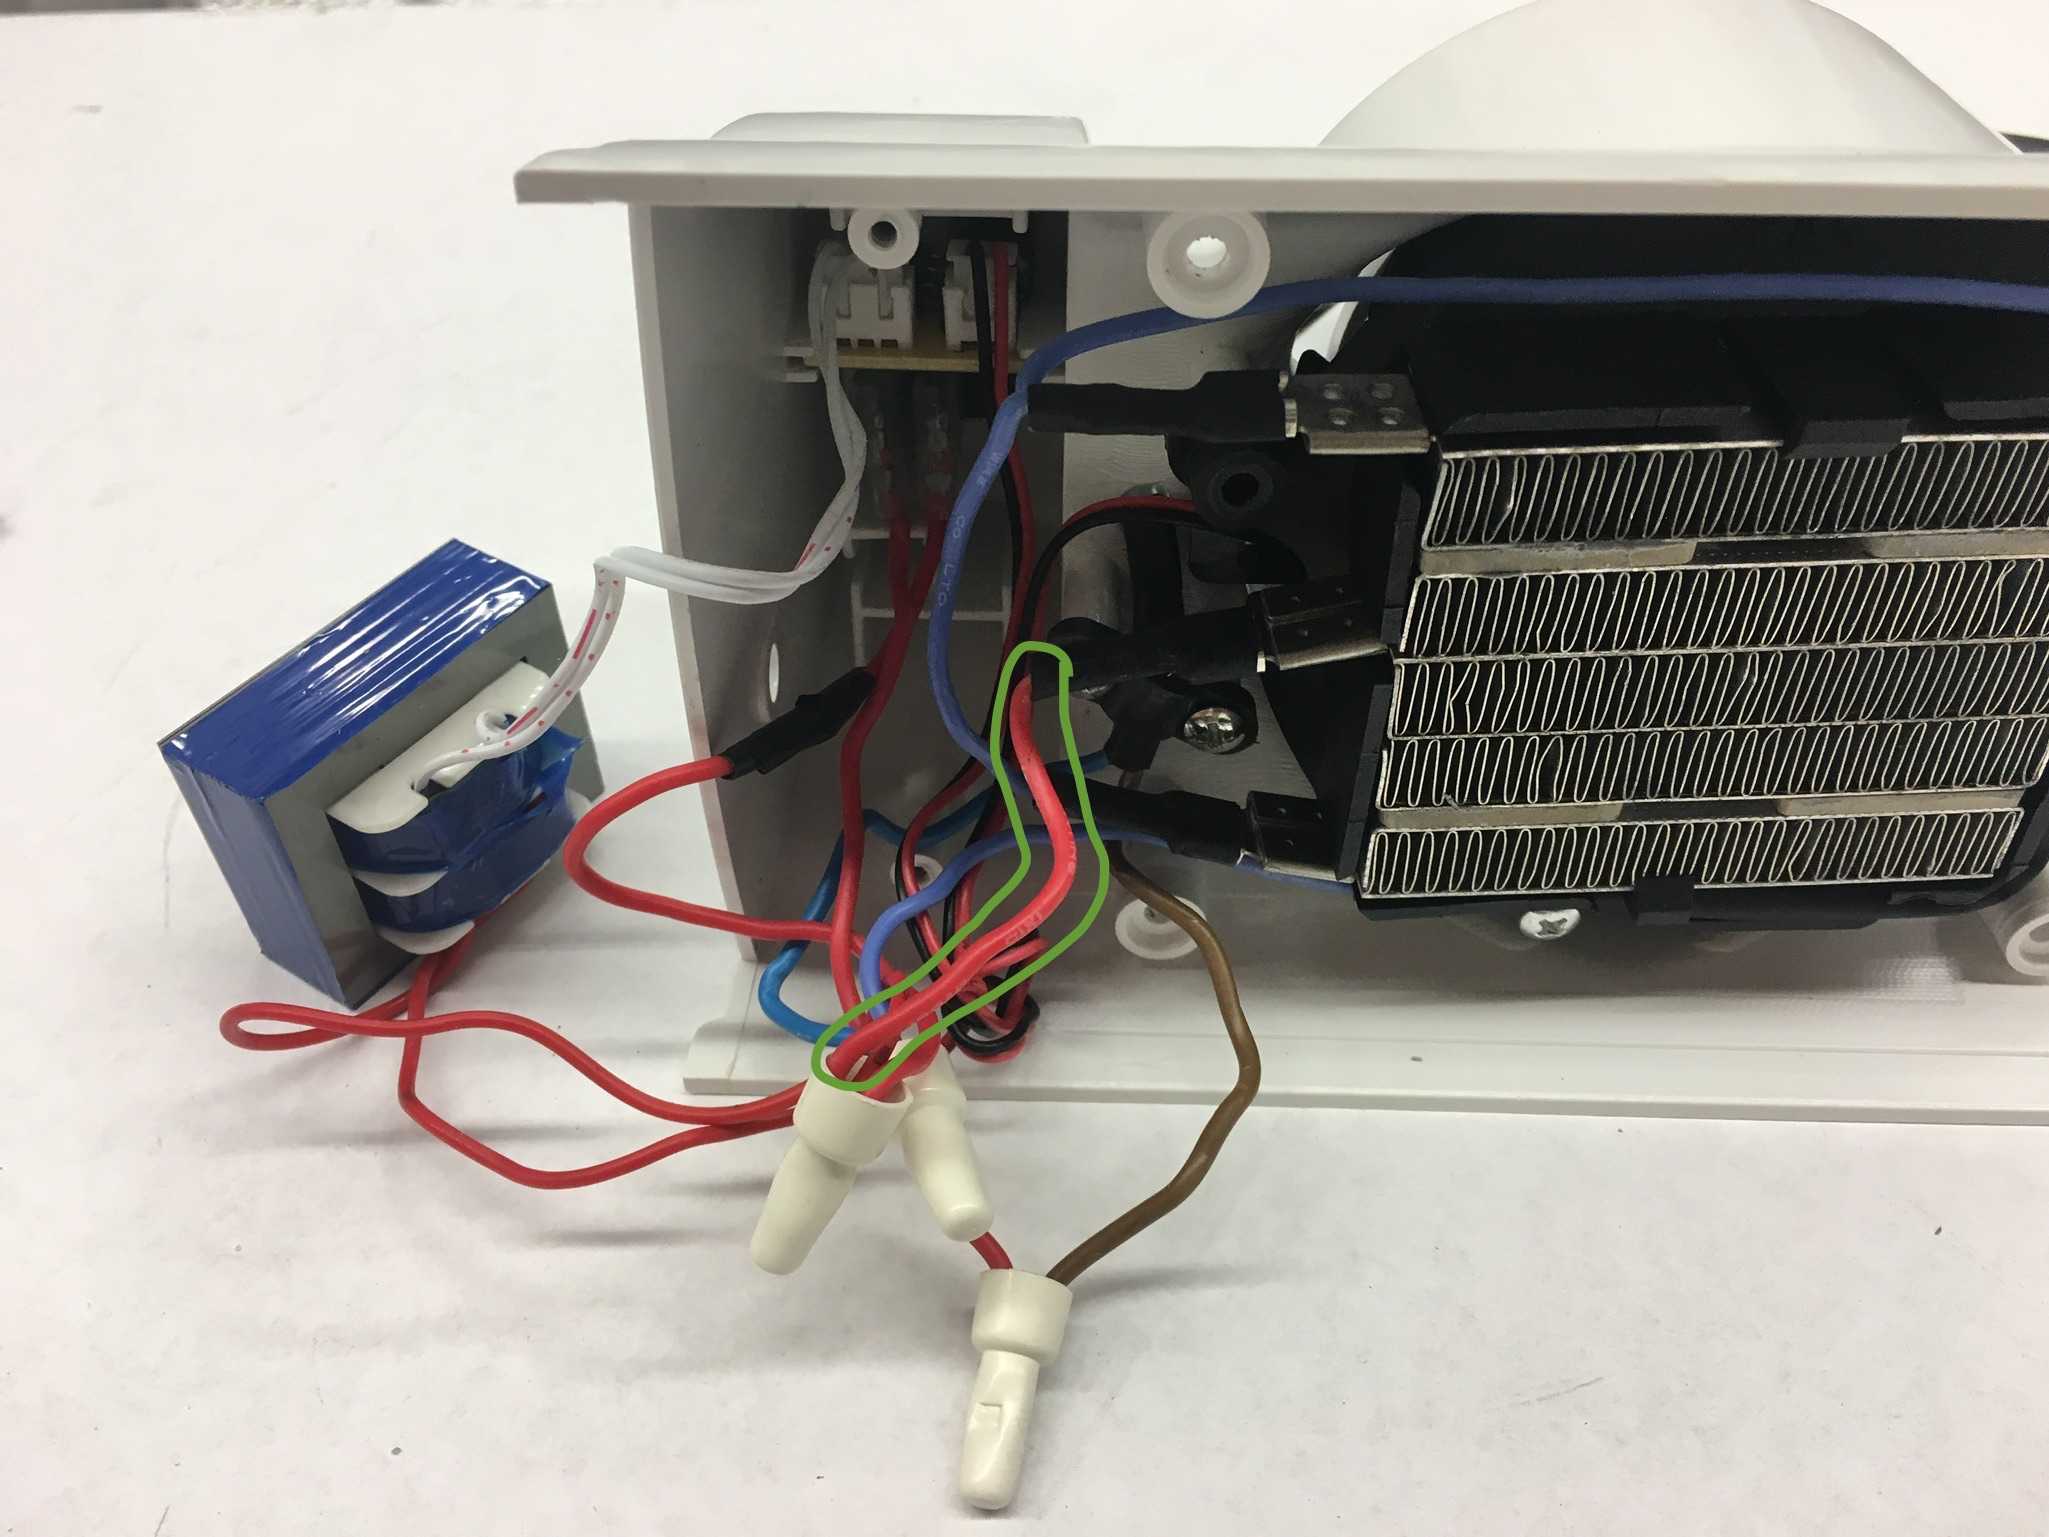
7. Find the red wire highlighted in the picture (it is connected to the heating element) and cut it in half. Strip both ends.

8. Take a piece of wire of the length you calculated in step 1 and strip one end. Connect this to the red wire that is still connected to the heating element.
9. Take about 10 cm of wire and strip one end. Connect this to the other end of the red wire.
10. Take the bright blue wire and strip a bit of its isolation without cutting it.
11. Take another piece of wire of the length you calculated in step 1 and strip one end and connect it to the blue wire.
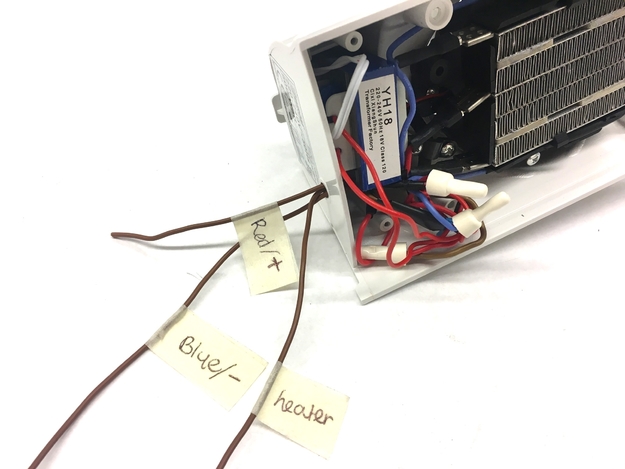
12. Put all wires you added through the hole in the bottom of the device and label them so you know which is which. Is used the terms ‘heater’ for the wire connected to the heating element, ‘red/+’ for the one connected to the other red wire and ‘blue/-‘ for the one connected to the blue wire.
13. You can now reconstruct the insides of the device and close it up. You can leave out the plastic bracket if you find it hard to fit back in. Also leave out the pushbutton, since it’s not connected to anything anymore.
14. Strip the end of the short wire (red/+) and connect two wires to it that are long enough to reach your thermostat.
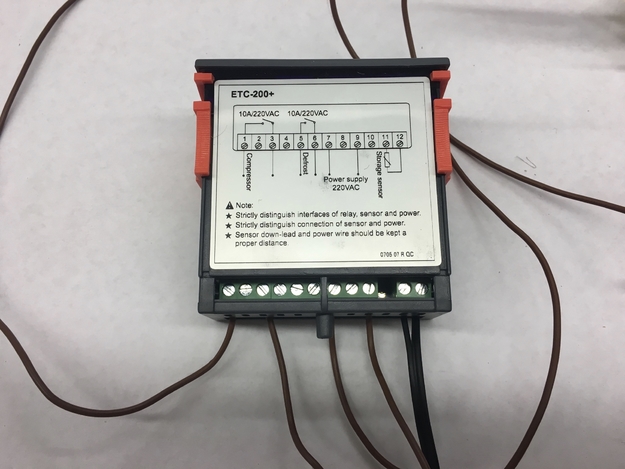
15. Unscrew the back of your thermostat to reveal the connection ports.
16. Strip the ends of all remaining wires. Only strip it a little bit, a few mm will do.
17. Connect one of the ‘red/+’ wires to port 1 and the other to port 7.
18. Connect ‘heater’ to port 3.
19. Connect ‘blue/-‘ to port 9.
20. Connect the temperature sensor to ports 11 and 12.
21. Screw the back on again.
22. Plug in the heater and turn it on.
These were all the steps to hack the heater ventilator. Now you just need to adjust the settings of the thermostat. Since the instructions that come with it are extremely unclear, here’s what you need to do:
1. Press SET for 3 seconds. Enter 1 three times by pressing up and the defrost 3 times.
2. The screen will say F01. Press defrost to enter the setting. Now set the number to the upper temperature limit in ºC and press SET 2 seconds. This will temporarily save the setting while you change the rest. However, if you wait to long and the device snaps out of the menu, the setting will be lost.
3. Press up to go to F02 and press defrost to enter the setting. Set the number to the lower temperature limit in ºC and press SET for 2 seconds.
4. Press up until you get to F08 and press defrost to enter the setting. Set the value to 1 to set the function to heating.
5. Press SET for 3 seconds. You will return into the entry screen and your setting are saved. To check if the settings were saved you can press up. The screen will then display your upper temperature limit. Down will show your lower temperature limit.