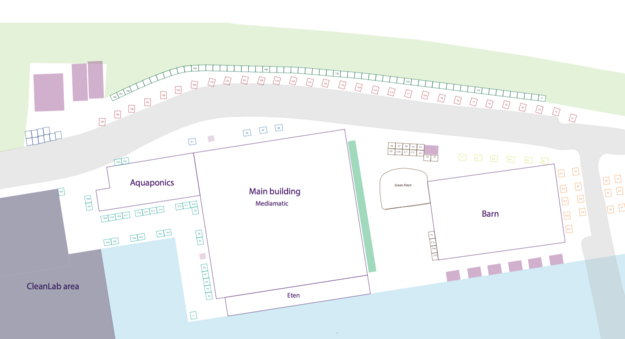
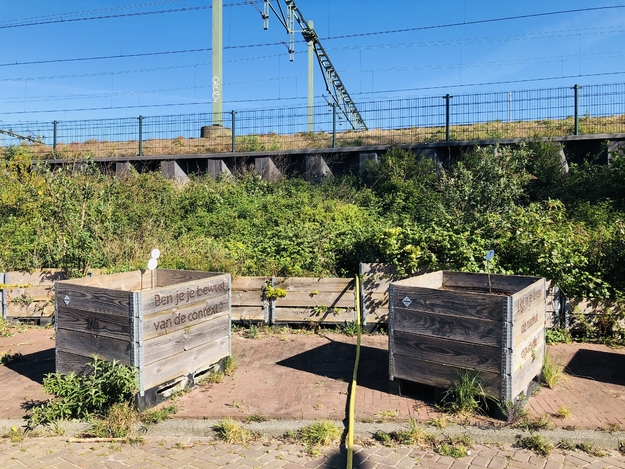
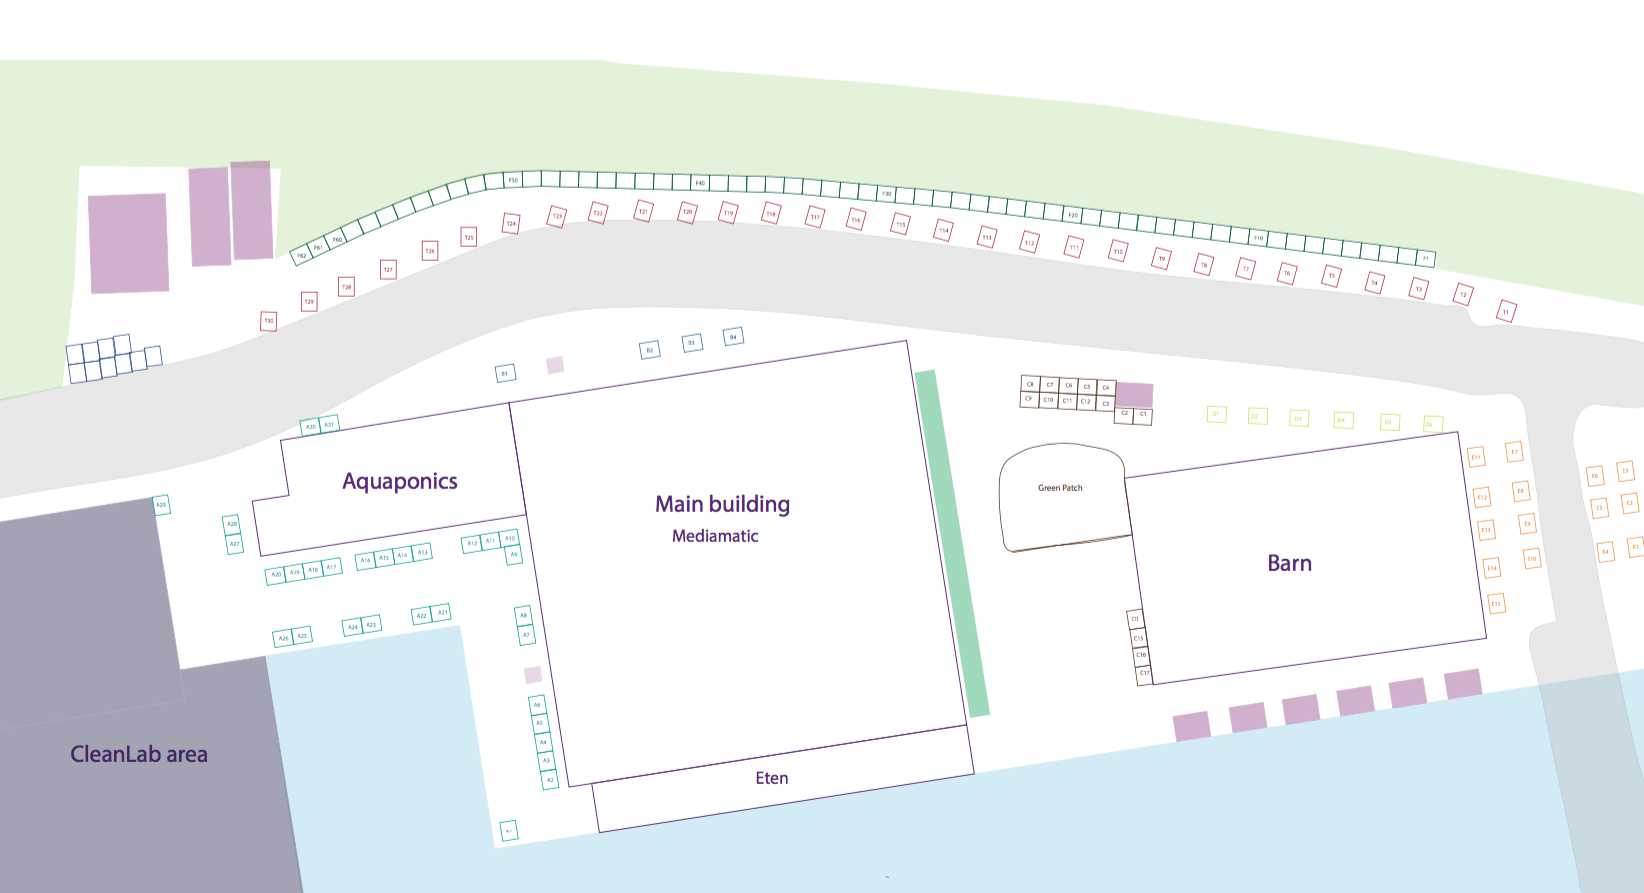
We have a large number of grow beds that are part of the Biotoop, also known as Hortus Dijkspark. The plants have different needs per season. The sun comes up in the east, which means that the plants on the side of the Sluisdeurenloods get some morning sun. As it sets in the West, the terrace has sun until the late hours of the day. To not talk in terms of West, East, North and South, and to not stress when a grow bed is moved, we gave the grow beds letters and numbers from A to E (and the Twijfel Zaaien installation a T).
To prevent the plants from wilting in summer, they need plenty of water. How much and how often should water them? Below are some smart and helpful facts for watering the plants.
Maintain proper soil moisture levels. Most plants depend on even moisture. However, slight drying out before watering promotes root growth of the plants.
Water less often, but thoroughly. Better to reduce the frequency of watering and up the amount of water each time, than to do often with little water.
Water late in the evening or early in the morning. When you water cooled soil in the evening or at night, less water evaporates than it would on hot soil during the day. The plants can sufficiently supply themselves with water before the next day's heat.
Keep leaves dry to avoid diseases. Wet leaves become diseased leaves. Leaves that are made wet in the sun develop slight burn marks (burning glass effect of the water droplets). When leaves are wet overnight, leaf-mould diseases may result.
Ensure the water reaches the roots. Suitable watering means that the water must sufficiently reach the roots. Too-low water quantities often only cover the upper soil. Water needs a moment to seep into the soil. Divide the water over the growbed, so that the precious water doesn't flow away unused.
Season: Summer
Water routine
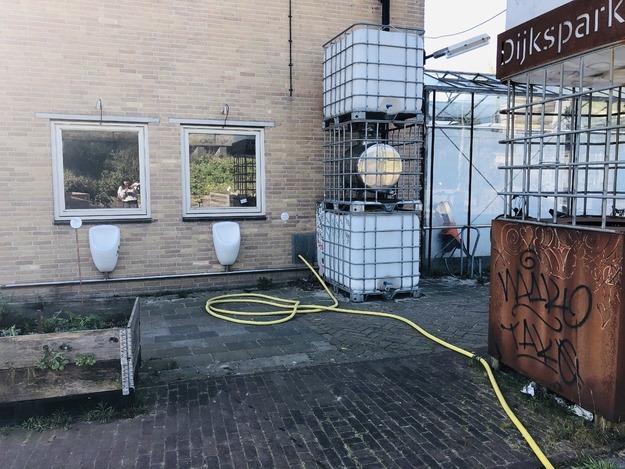
Start with the E-grow beds behind the Sluisdeurenloods. To reach these, you have to attach all the parts of the big yellow water hose ánd the flexible green hose. See picture for connection piece. On the street side, next to the urinals (Pure Gold) you can find a big yellow water hose.Vergroot
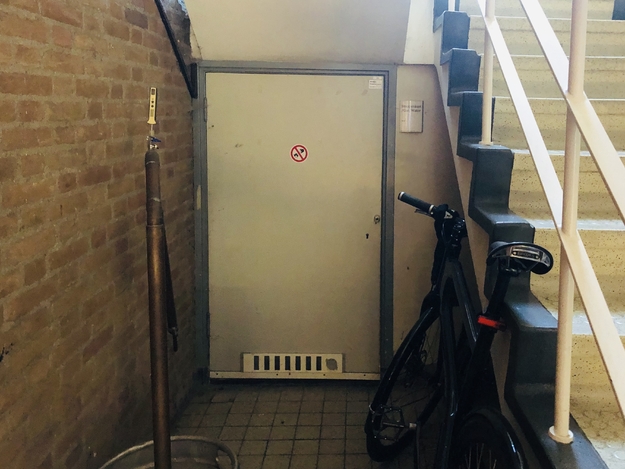
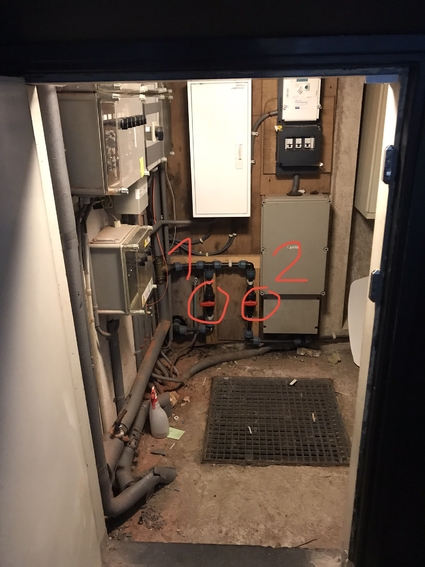
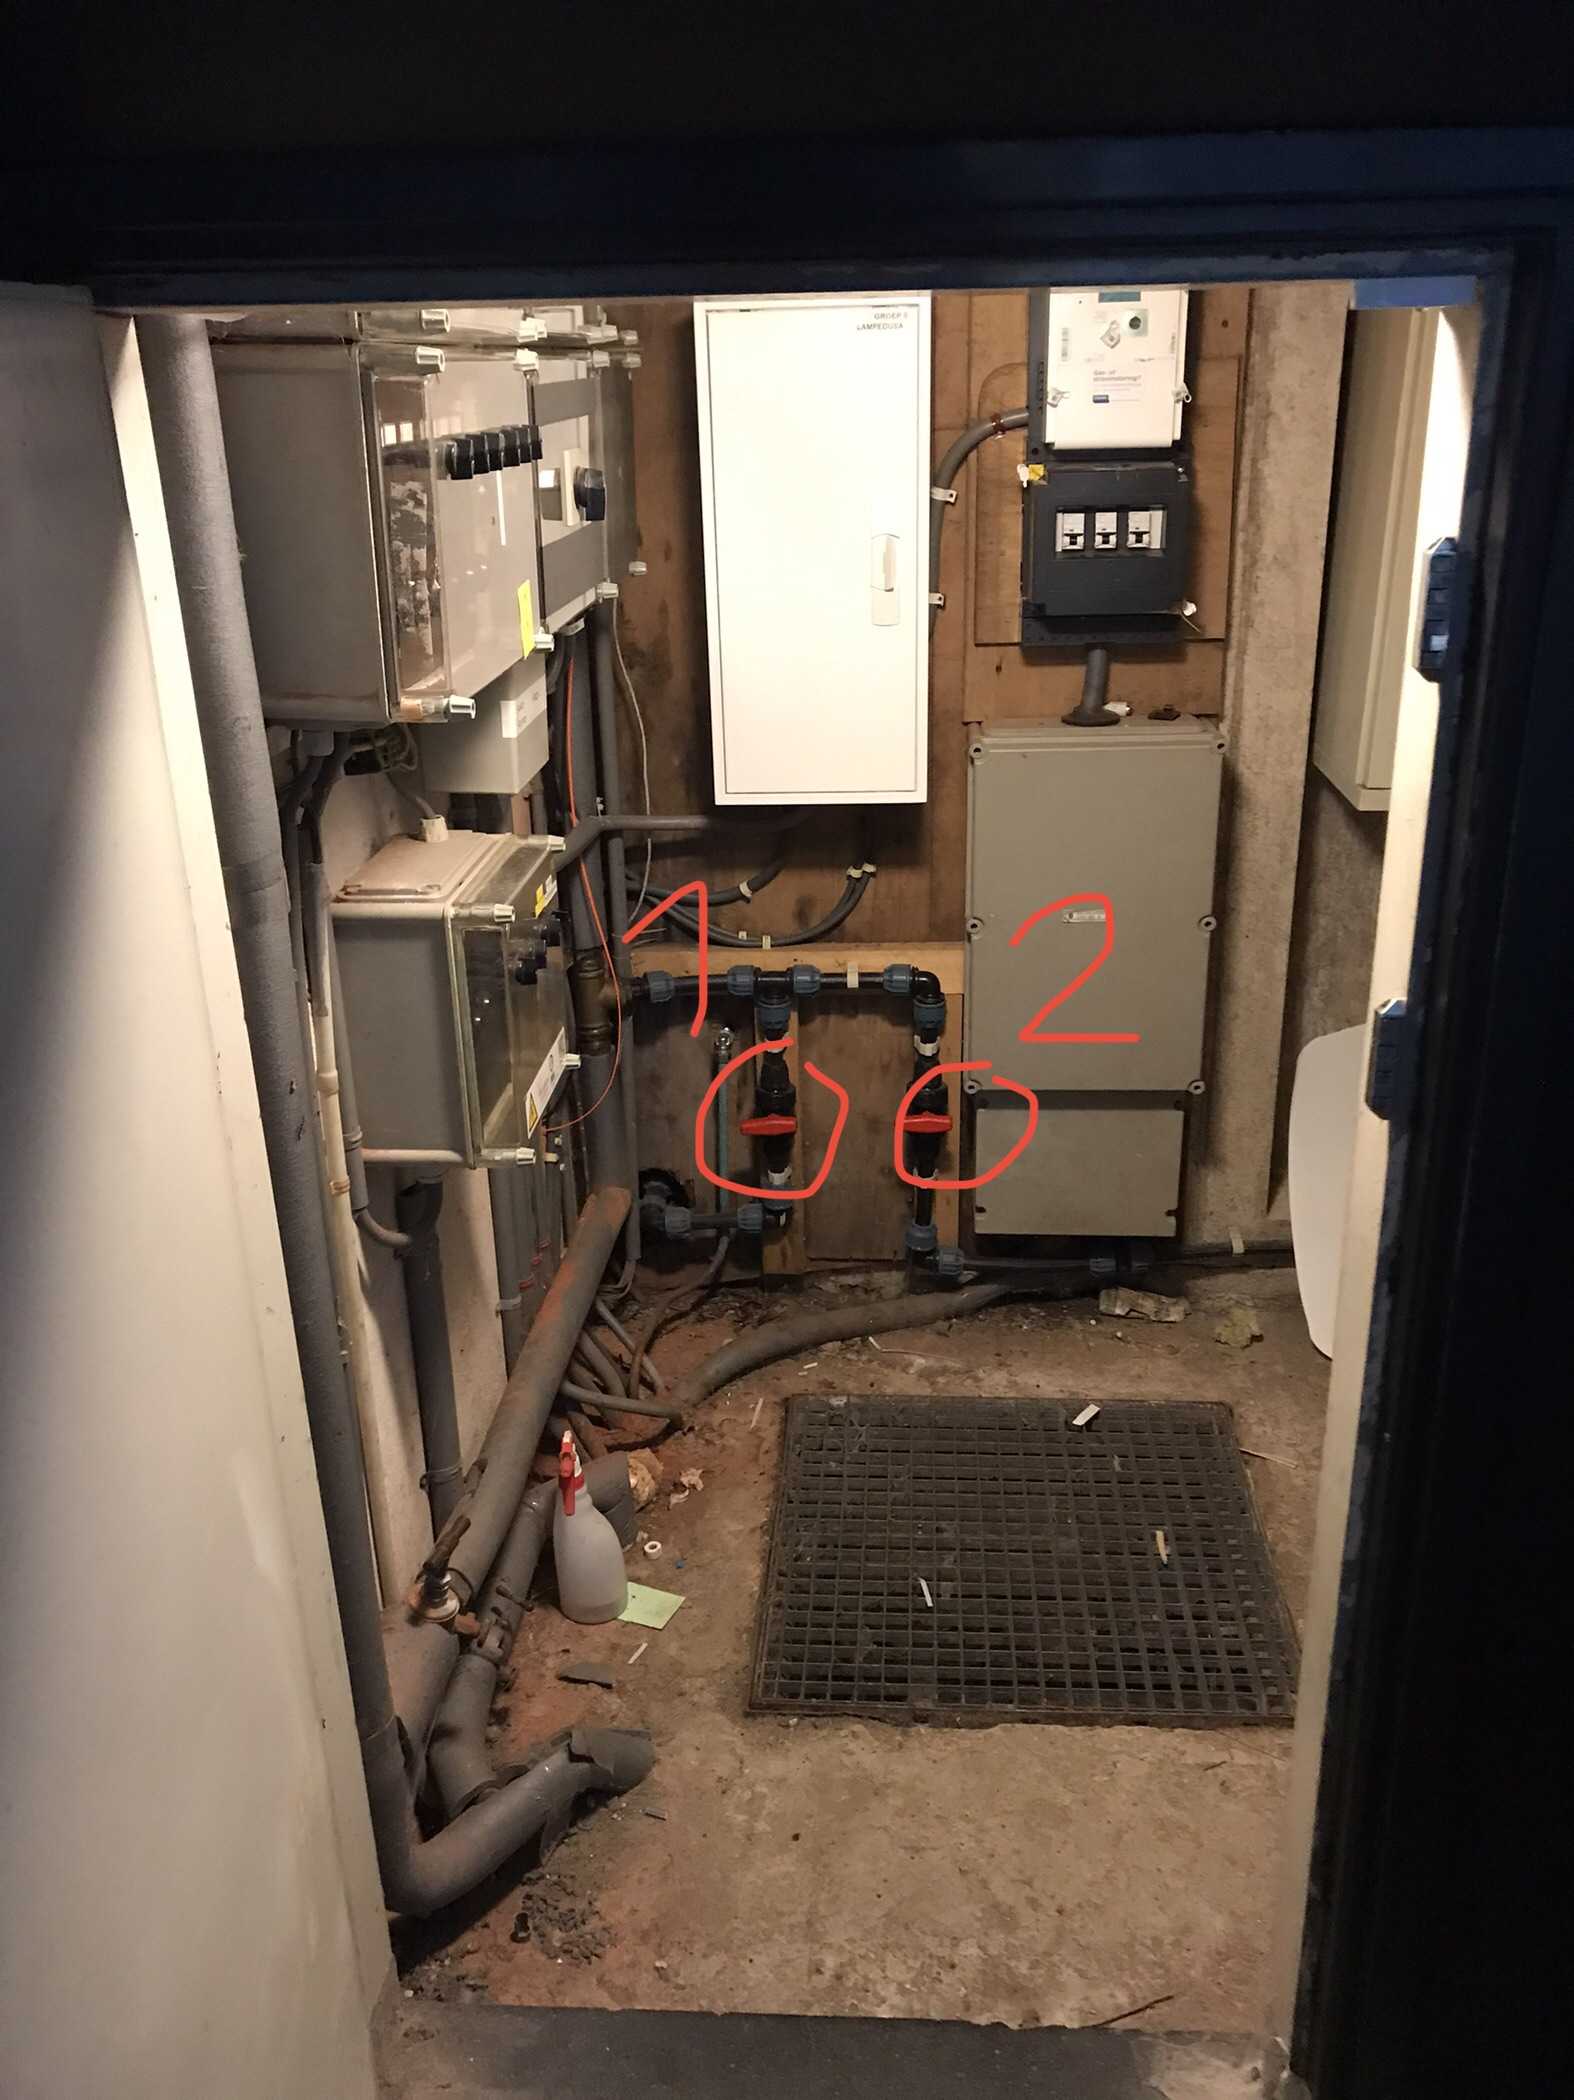
Go into the main building and walk to the staircase. Open the door and turn on the light located on the wall inside, immediately on your right. To turn the water on, turn the right (number 2) red horizontal knob counter-clock-wise until it is vertical. To turn the water off, turn the red knob clock-wise.Vergroot
Work your way towards the main building through grow beds T and C.
Don't forget about Tumulus: the green hill and the few C-grow beds in front of the Sluisdeurenloods.
Continue to water all the T-grow beds and when you pass the Aroma Lab, also water the B-grow beds.
Walk to the Aquaponics entrance and get the other yellow hose to water all the A-grow beds.
Then lastly, turn on the irrigation system for the Talus grow beds, also known as the F-growbeds. Find how to do so below.
When watering growbeds B C D E and T. Give the plants enough water, every growbed should get around 2-3 minutes of water. This might feel like soaking them, but as they cannot get water from the 'ground', they really need it.
Watering the Talus grow beds
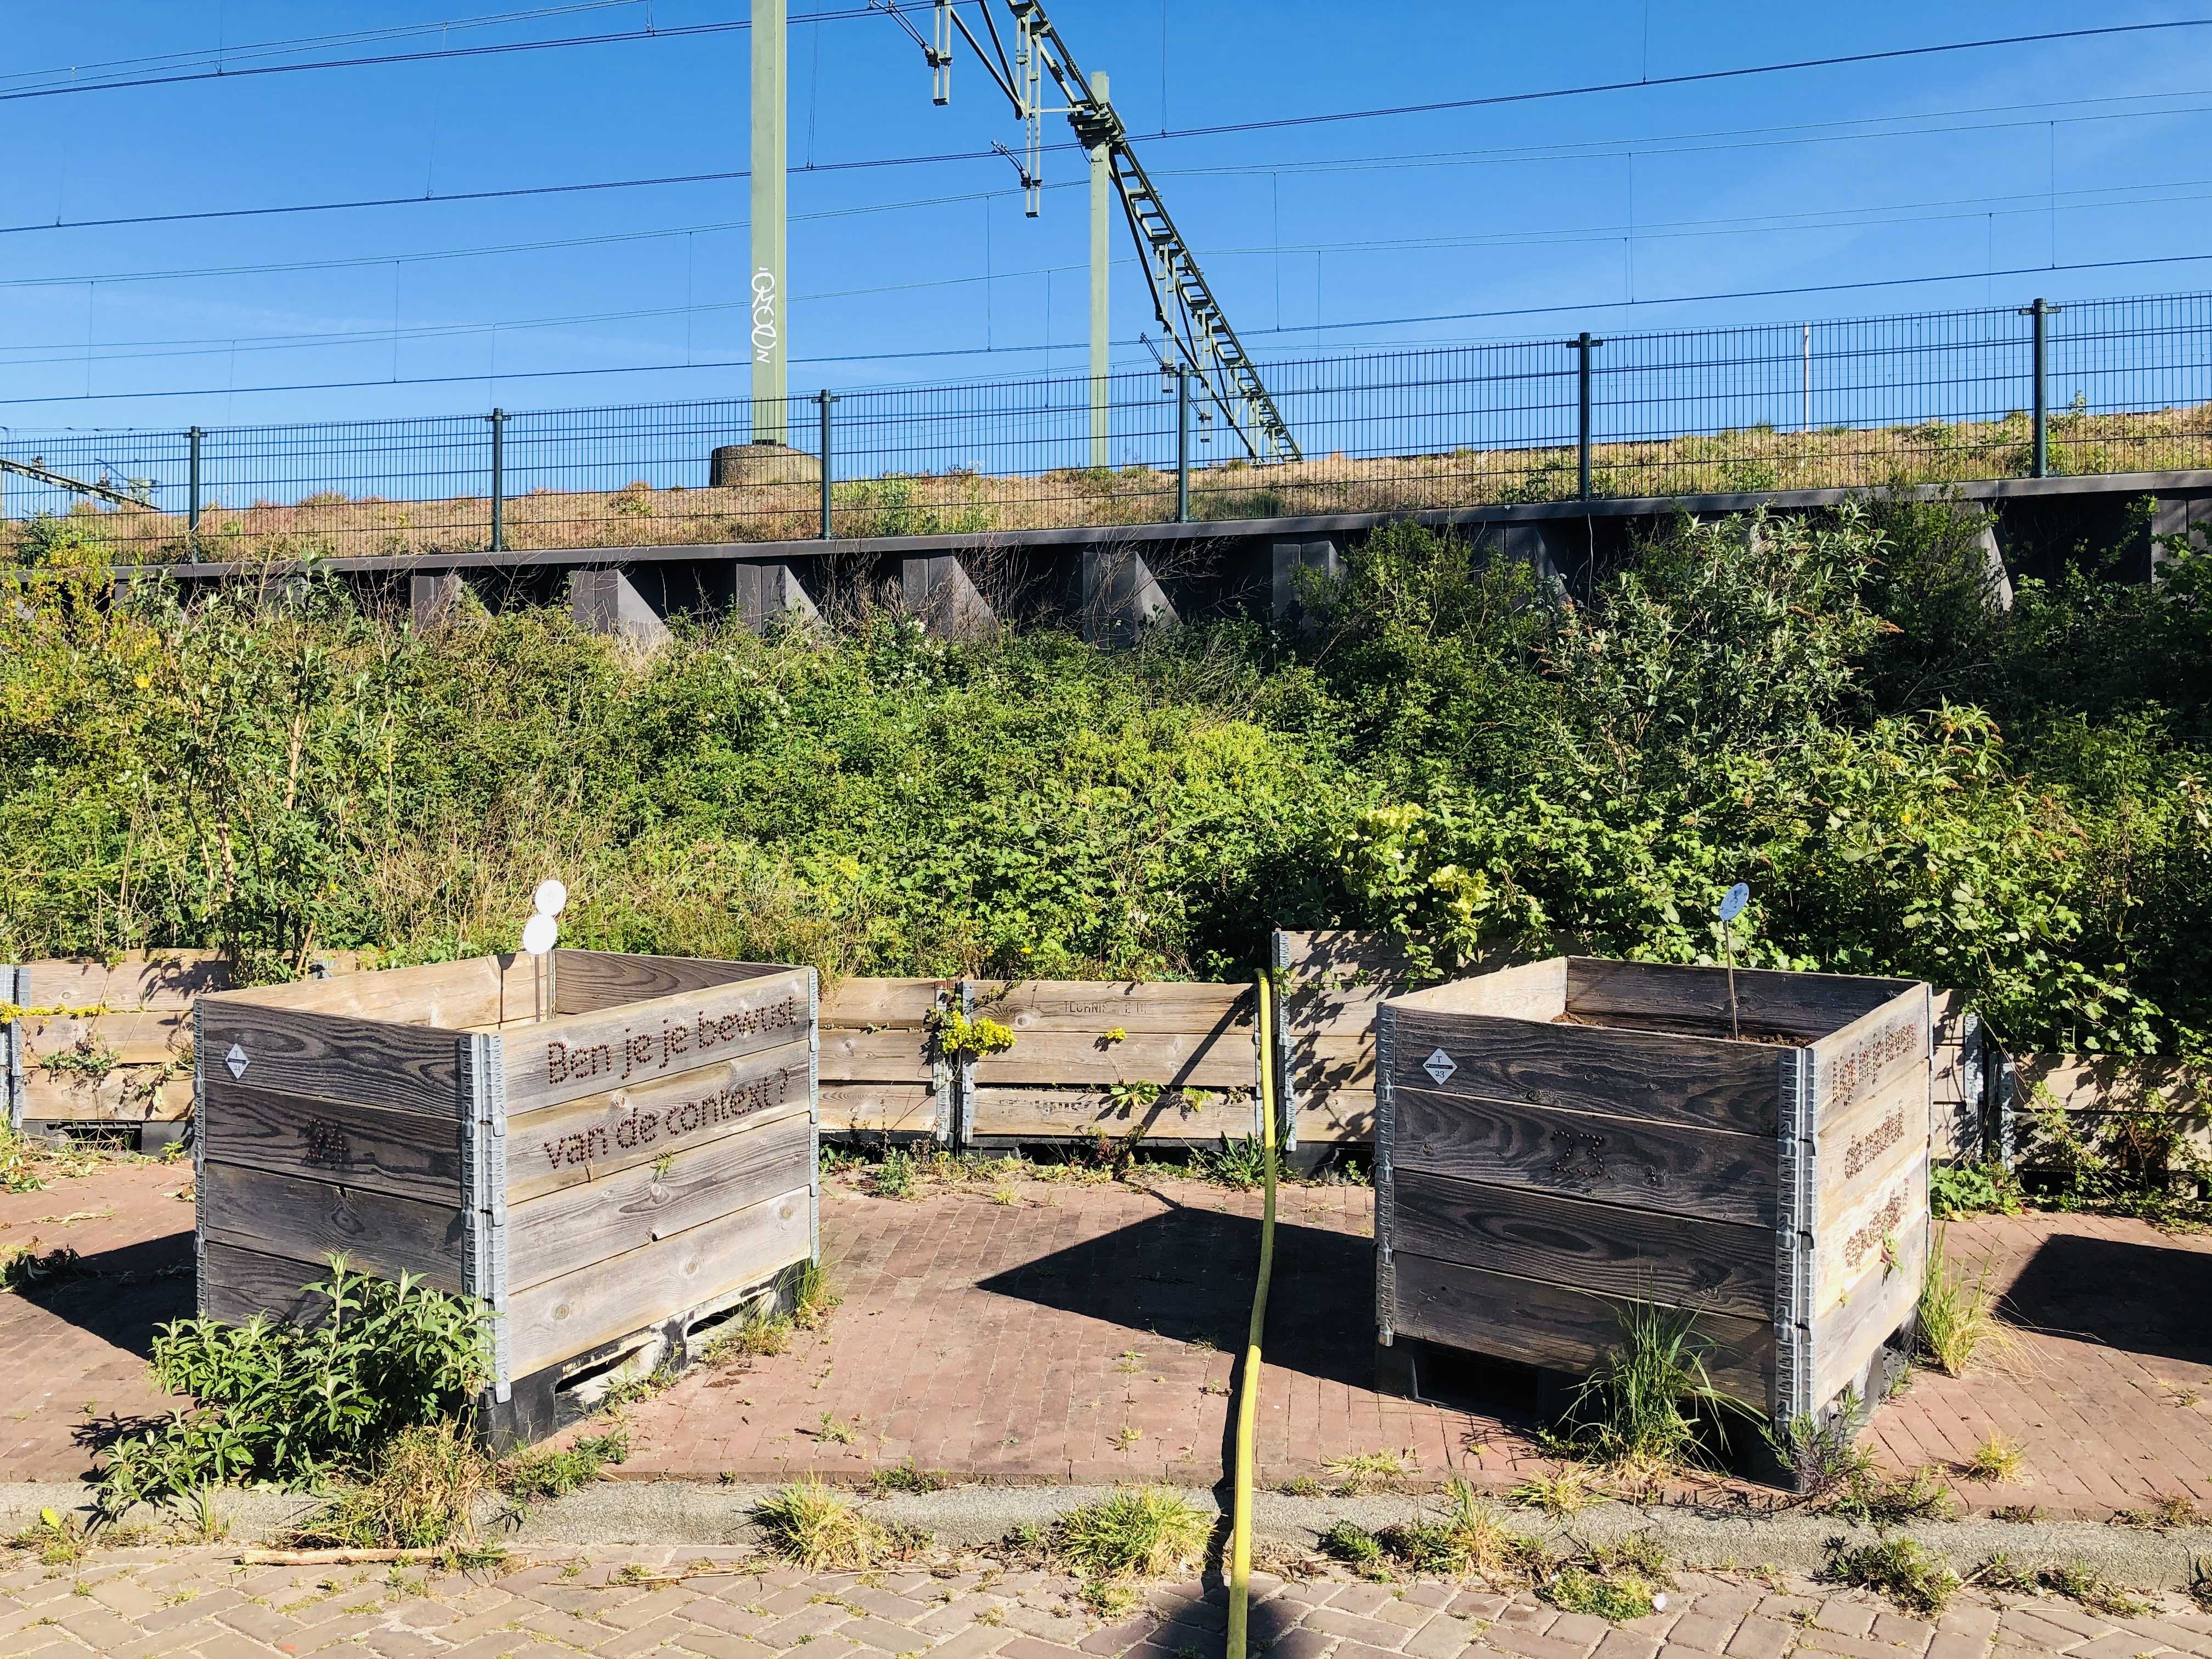
To water grow beds on the talus (F), you attach the yellow hose next to the urinals to the connection in the grow bed between question number 24 and 23.Vergroot
Leave on for about 2 hours to properly water the grow beds.
Watering the A-grow beds
Attach the yellow water hose to the single connection point in the wall. In case you do not find any yellow water hoses in front of the Aquaponics, move the longest one from the urinals to the Aquaponics.
To turn on the water for this hose, go into the main building and walk to the staircase. Open the door and turn on the light located on the wall inside, immediately on your right. Turn the left (number 1) red horizontal knob counter-clock-wise until it is vertical. To turn the water off, turn the red knob clock-wise.Vergroot
If you borrowed the yellow water hose from the street side, please return them.
Extra Watering info
Watering the plants requires some extra love and understanding. The very best time for watering is in the early morning, while it is still cool. This will allow the water to run down into the soil and reach the roots of the plant without too much excess water lost to evaporation.
Morning
Watering in the early morning will also make the water available to the plants throughout the day so that the plants will be able to deal better with the heat of the sun. There is a gardening myth that watering in the morning will make the plants susceptible to scorch. This is not true. First of all, almost all areas in the world do not get intense enough sun for water droplets to burn the plants. Second of all, even if you live in an area where the sun is that intense, the water droplets would be evaporated in the heat long before they could focus the sunlight.
Afternoon / Early evening
Watering the plants in the afternoon sometimes can be difficult due to work and life schedules. The second best time to water a vegetable garden is in the late afternoon or early evening. If you are watering vegetables in the late afternoon, the heat of the day should have mostly passed, but there should still be enough sun left to dry the plants a bit before night falls. Watering plants in the late afternoon or early evening also cuts down on evaporation and allows the plants several hours without the sun to take up water into their system. One thing to be careful of if you water in the late afternoon is to make sure that the leaves have a little time to dry before night comes. This is because damp leaves at night encourage fungus problems, such as powdery mildew or sooty mould, which can harm the plants.
[Yvonne's update, 30.07.2020]
Using, fixing, and storinghoses
To be efficient, it is best to use the yellow hoses while watering the garden. The yellow hoses are the most resistant in terms of holes and subsequent leaks, and also allow the highest water volume and pressure. At the moment, there are 2 different yellow hose 'systems' in place, one on the aquaponics side, one on the street side. The hose on the aquaponics side has recently been replaced (and the old hose has been fixed for leaks and stored inside the hose cupboard in aquaponics), and is composed of 2 hose pieces that together make a 50m-long hose. Should you need a longer hose length for any reason, you can always disconnect the second hose piece from the aquaponics side (which is a bit shorter than 25m), and connect it to lengthen where it is needed. Since this hose runs on the terrace (yet yellow hoses are difficult to roll up and store because of their weight), it is best if you leave the hose laying straight on the ground after using it, as close to the aquaponics windows (so that it is behind the terrace seating area). If it lies neatly on the ground, no one should complain about the messiness of the hose, and furthermore, it is easy to use for the next watering! The hose on the street side has not been renewed entirely, and should too many leaks appear, you can always make use of the brand-new 50m hose that is currently rolled up in aquaponics. Connecting parts for the hoses can be found in a box in the fish tank container inside aquaponics, and they are easily installed using a cross screwdriver. The hose on the street side is very long (>50m), but it cannot reach in front of the barn, so you will need to connect another piece to water there. Similarly, store the hose in a straight line as close to the inner edge of the sidewalk as possible. Pay attention when you are watering across the street to never leave the connecting metal joint on the street surface, otherwise it will get damaged by passing cars/ trucks!
Watering the grass from the Observatory installation
There are 2 large grow-beds between the barn and the restaurant, where we have recently planted grass (from rolls). Because of the construction method we used, the soil does not reach the bottom of the containers, and as such, upon watering, a lot of the water seeps through the soil rather than accumulate. Therefore, thorough watering is needed during warm summer days! To achieve that, you can easily drag the street-side hose towards the restaurant entrance, and you can then water for a couple of minutes per grow-bed. Only stop watering when water pours (considerably) through the wooden container. Water as often as you can (mornings preferred), especially because of the art installation on top of the grass, rain water barely reaches the grass! If you do not want to use the yellow hose, you can always connect the small green hose (which is stored in aquaponics) to the connection point on the inside wall of the bar. However, the water pressure and volume are considerably lower, so you will need to water for 15 min per grow-bed. After the roots mature, you can water them as all the other outside grow-beds.
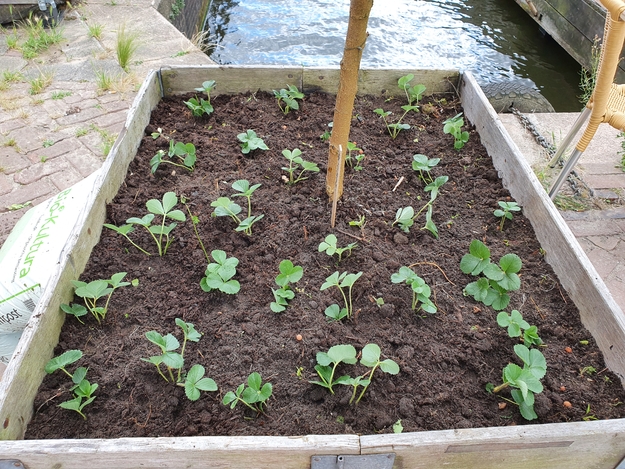
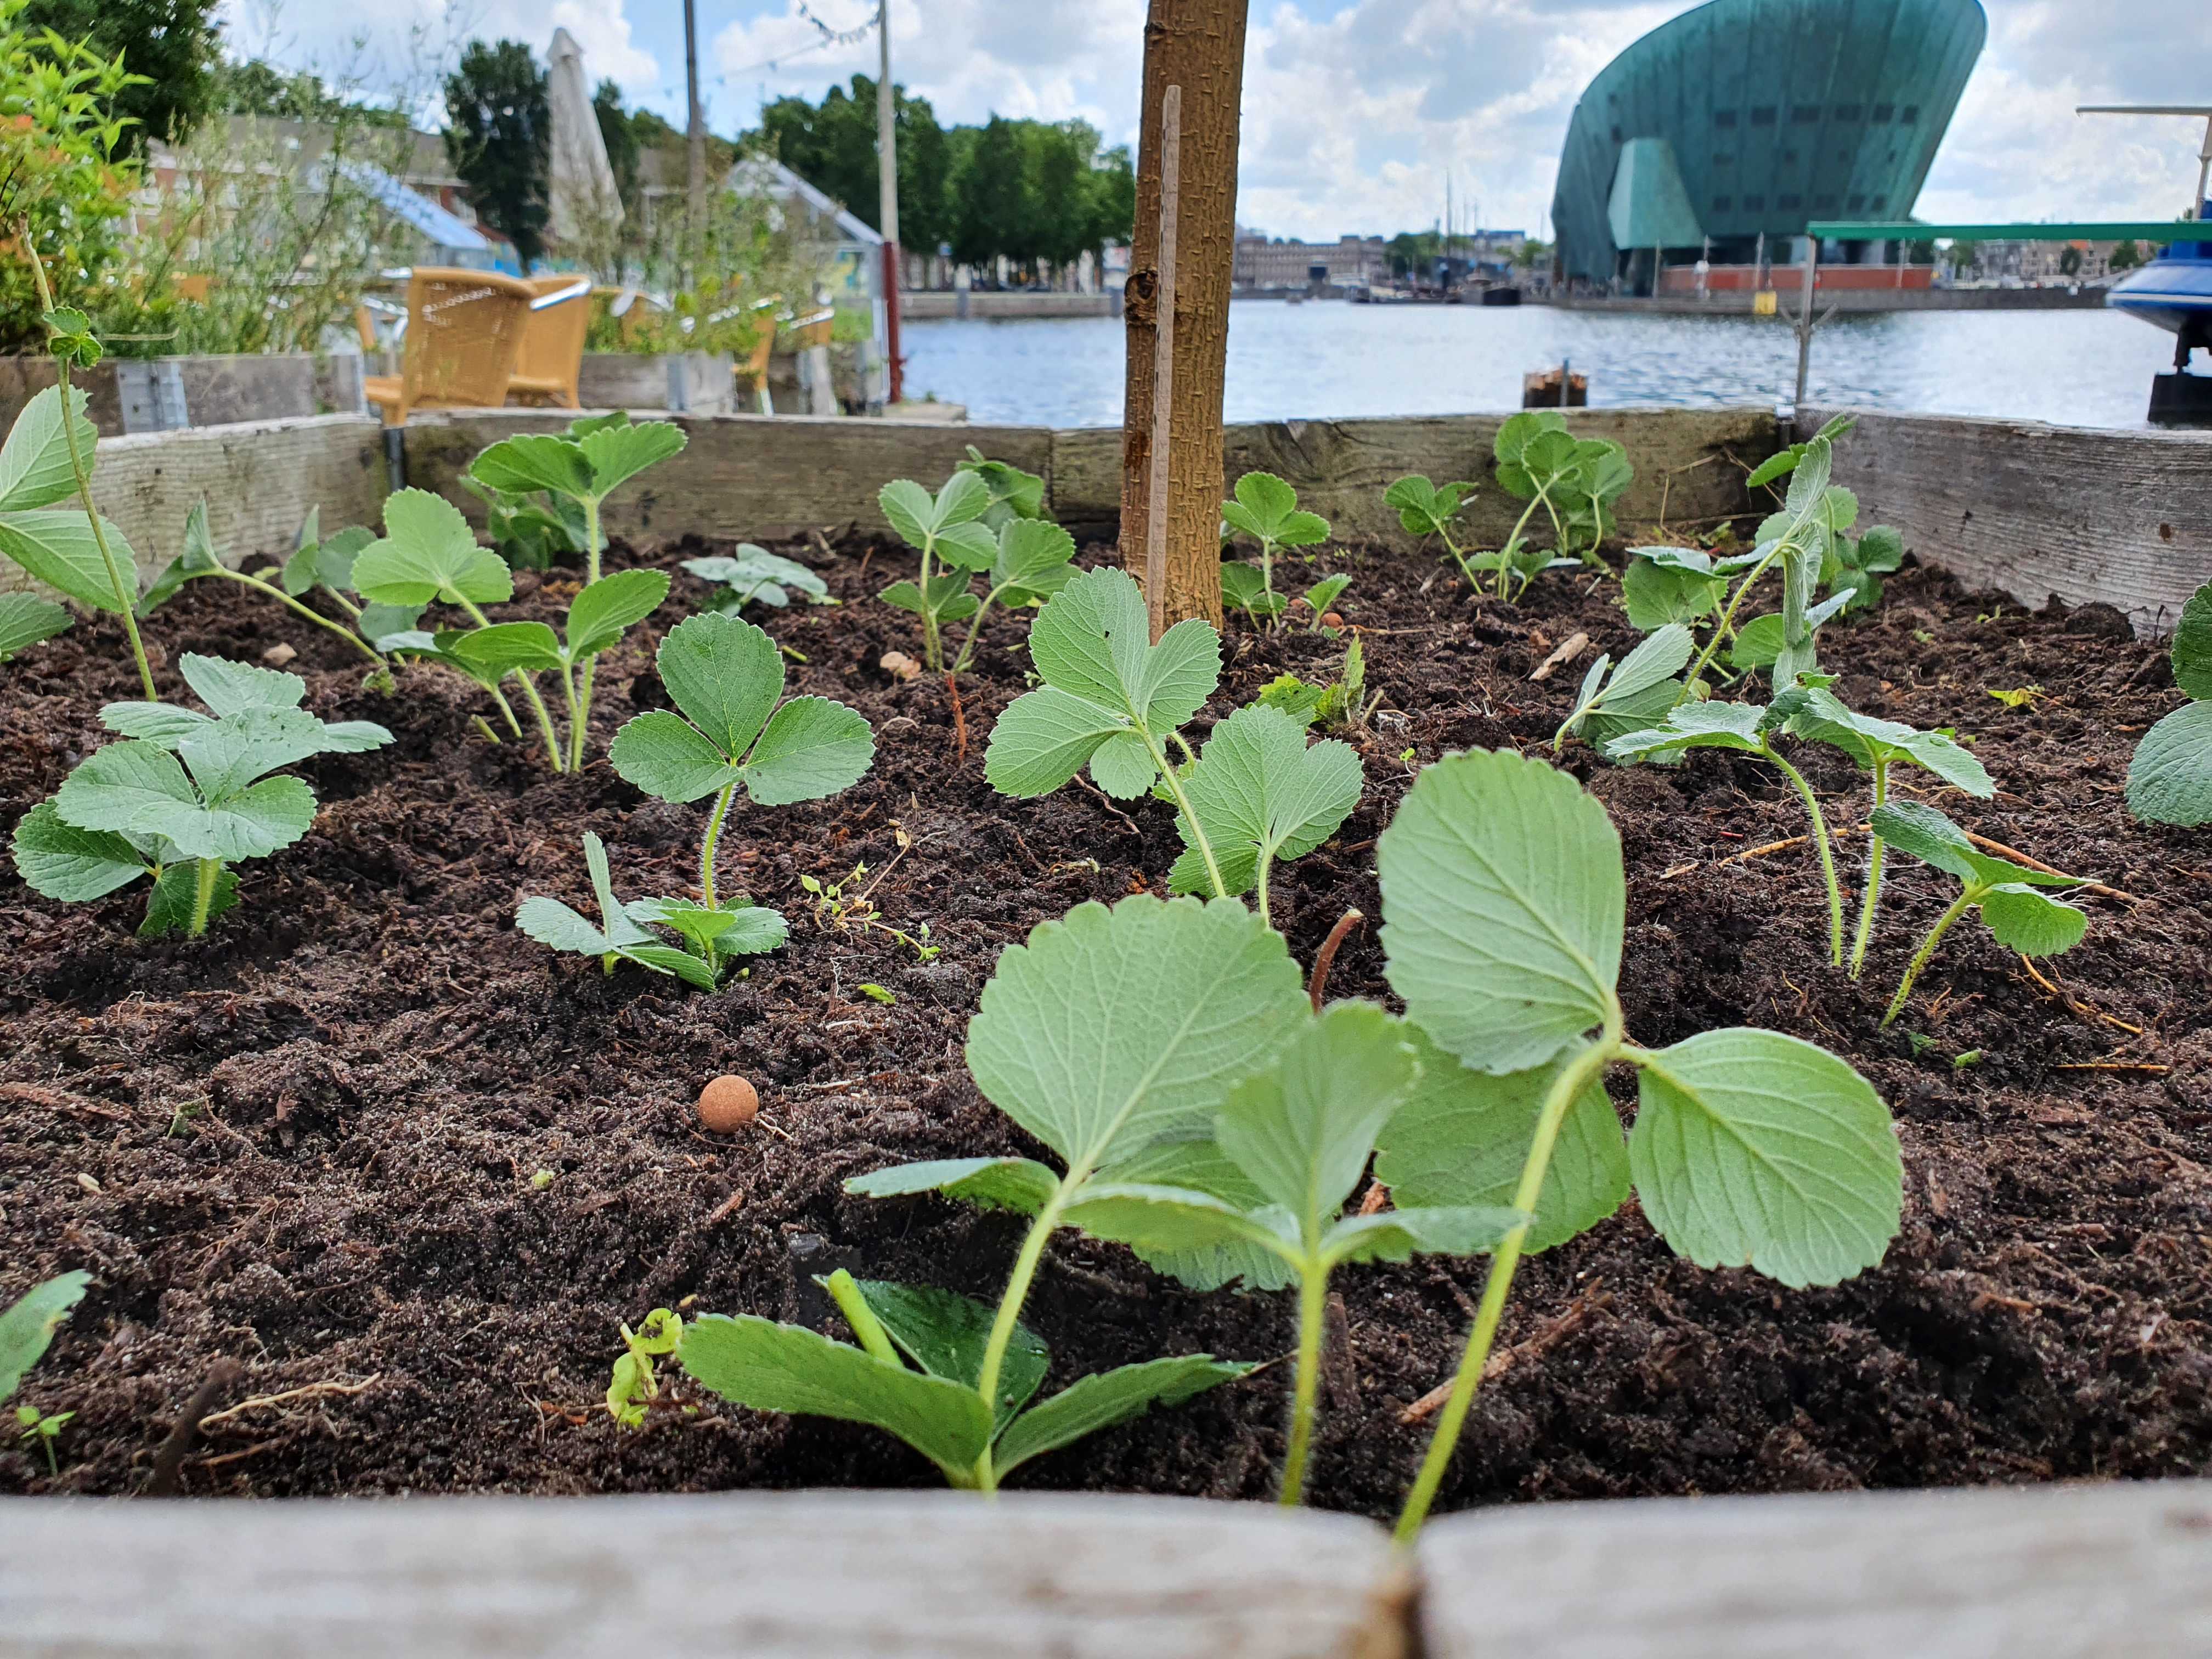
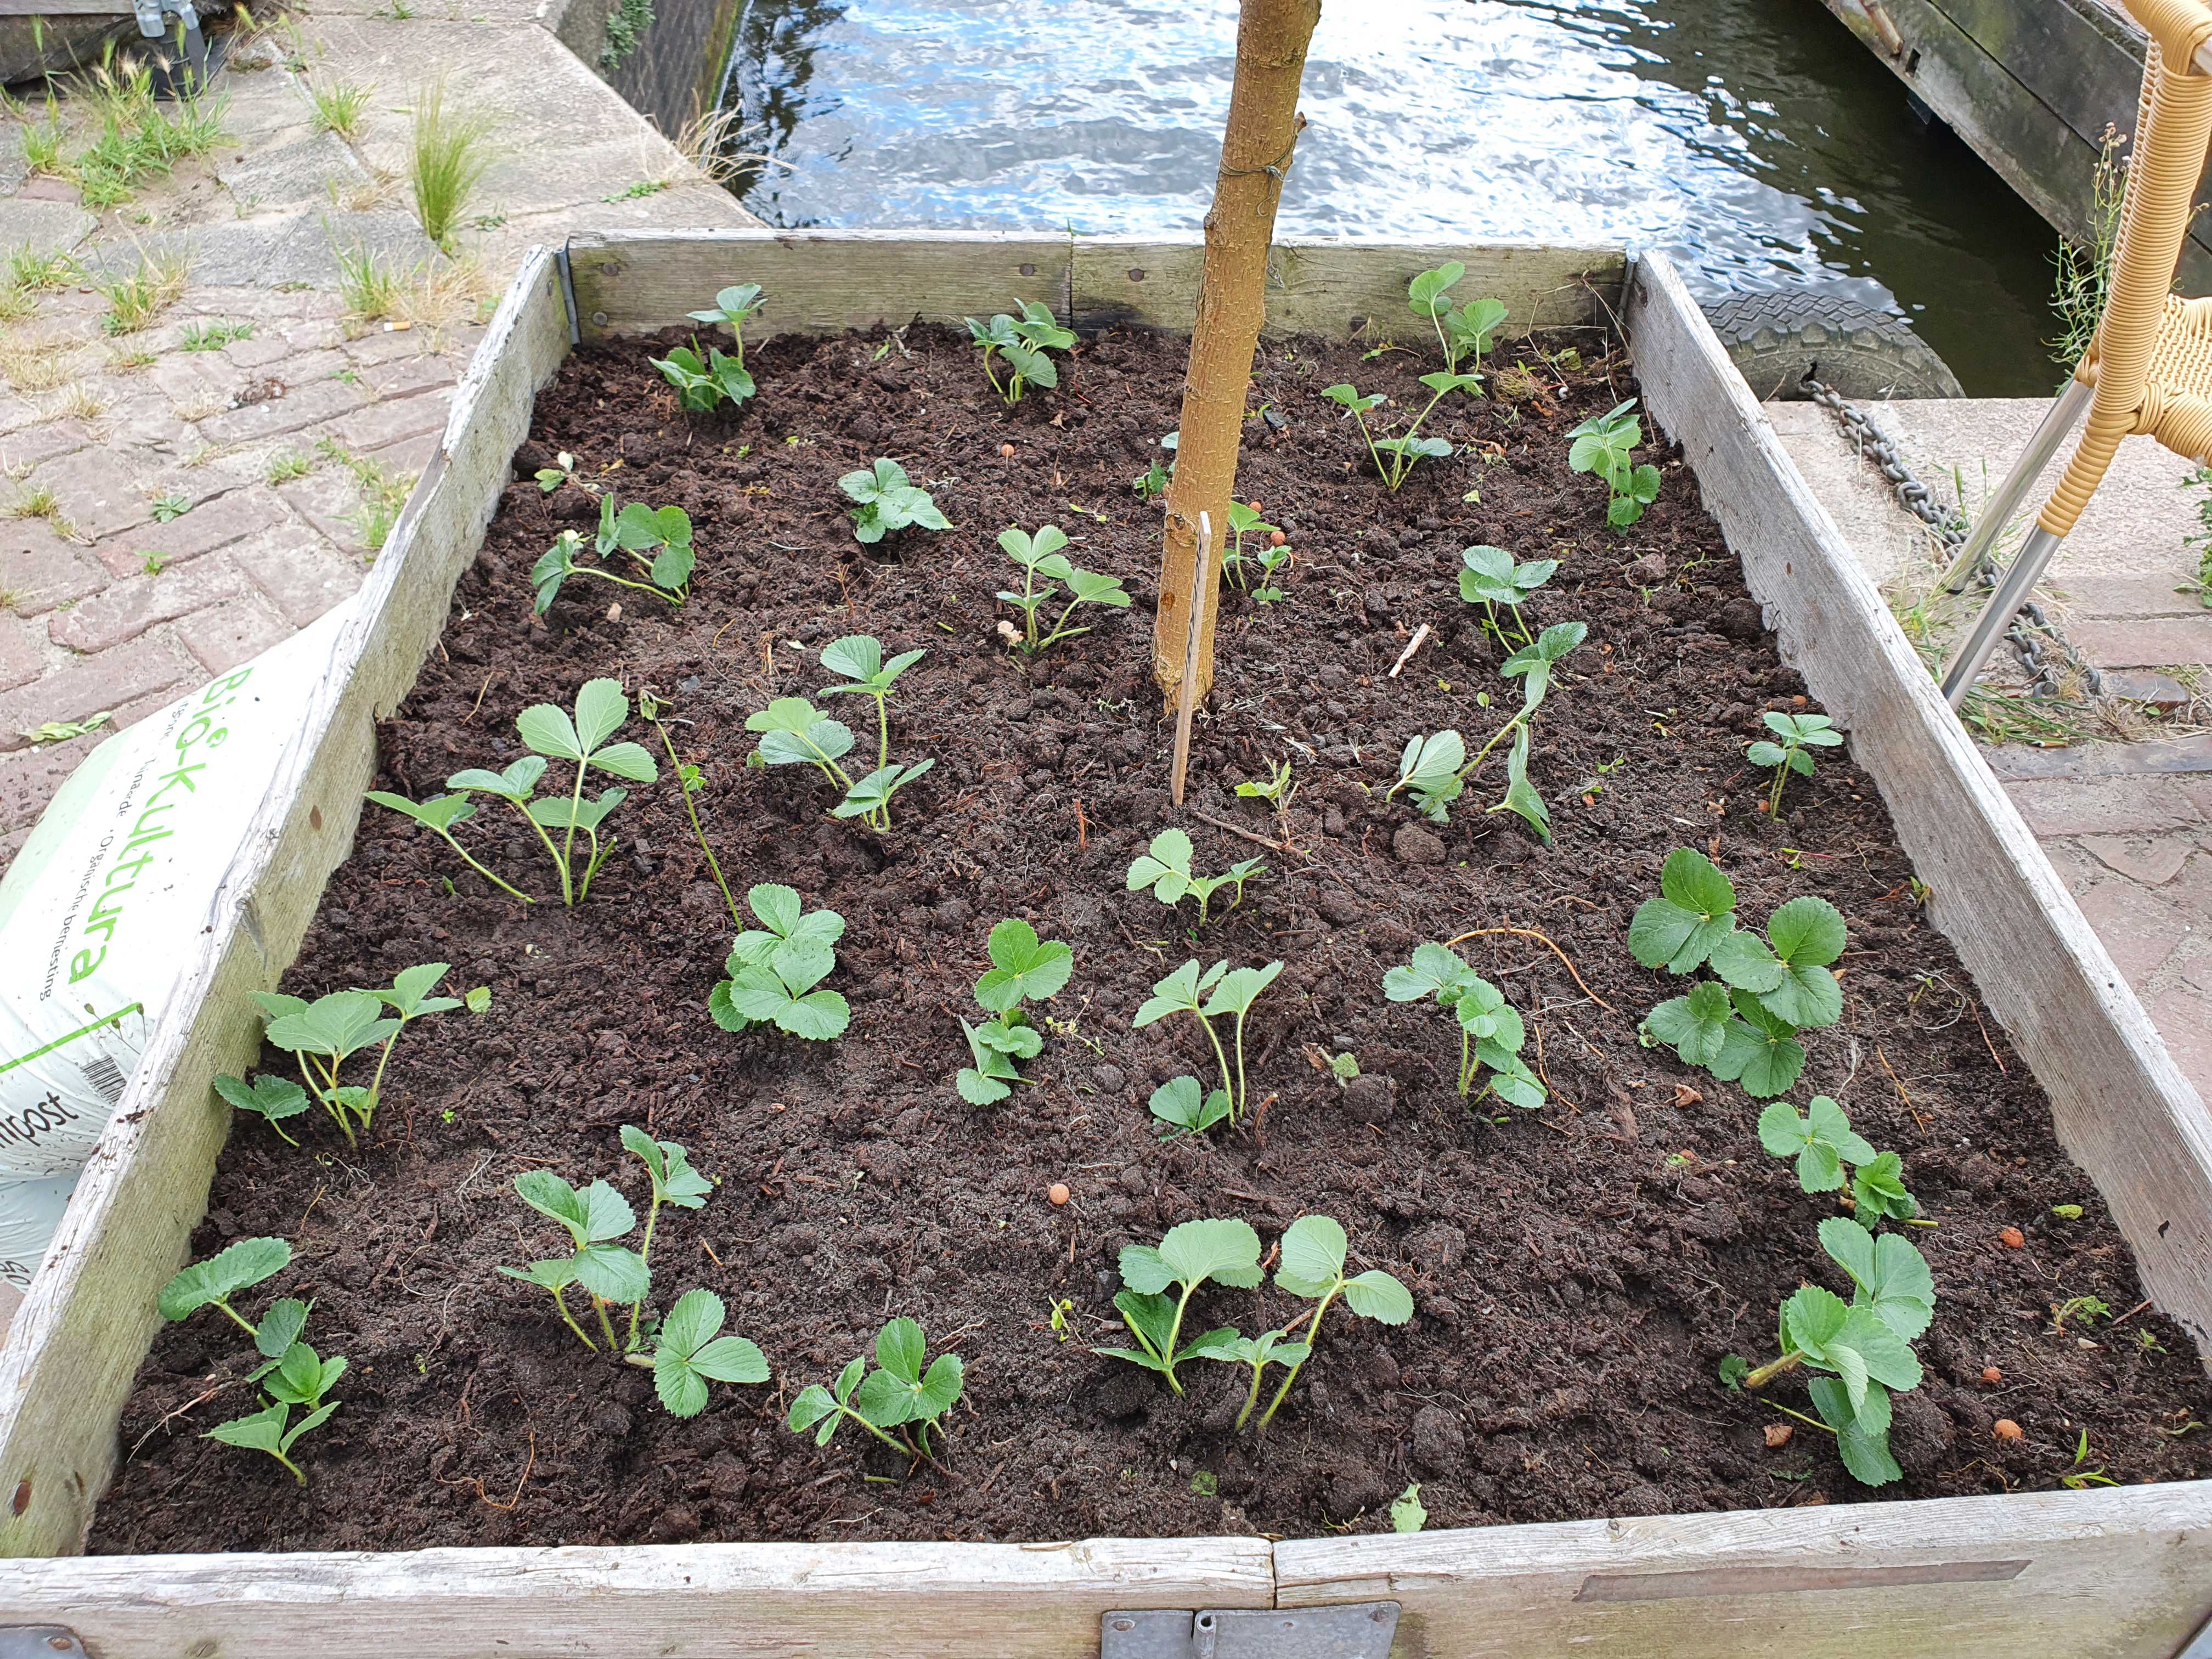
Watering the strawberries in front of aquaponics
Currently, you can find strawberries in 3 grow-beds in front of the greenhouse. These were recently transplanted from the grow-beds inside, since we realized that strawberry plants are not entirely suitable for growth in aquaponics (e.g. the fruits never get sweet). Over time, more strawberries will be moved outside, so you should know how to properly care care for newly-planted strawberries. Take a watering can (multiple can be found inside the greenhouse), and water newly planted strawberries every morning (for about 2-3 weeks), until their roots grow and attach to the bed. Don't water them with the powerful yellow hose, since the roots won't be formed yet and you will damage them!
Mediamatic houses a significant collection of indoor plants. In the Tuinkamer, you will find a lot of snake plants, also called Sansevieria, which need weekly watering in summertime. Please only water them when the soil is dry, because the only way to kill a snake plant is through overwatering! You will find a beautiful metal watering can on the window sill in the Tuinkamer, feel free to use it.
Within the Haeckel room, we have two huge palm trees that grow steadily under grow lights. Nevertheless, do not forget to water these once every two weeks (give one full watering can per palm tree). Also, do not forget the 2 Yucca plants growing in the corner of the Haeckel room! Keep them close to the windows, because the grow lights are too far away to provide light.
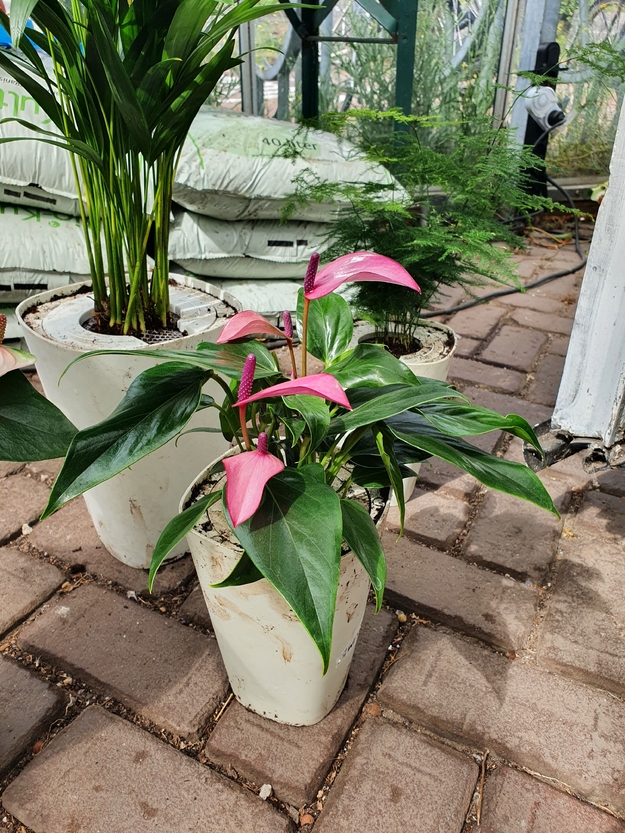
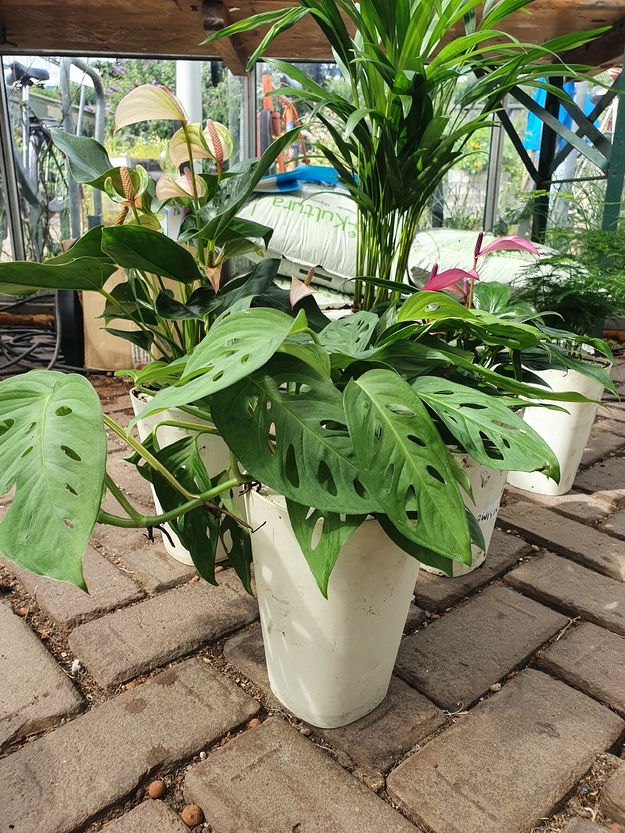
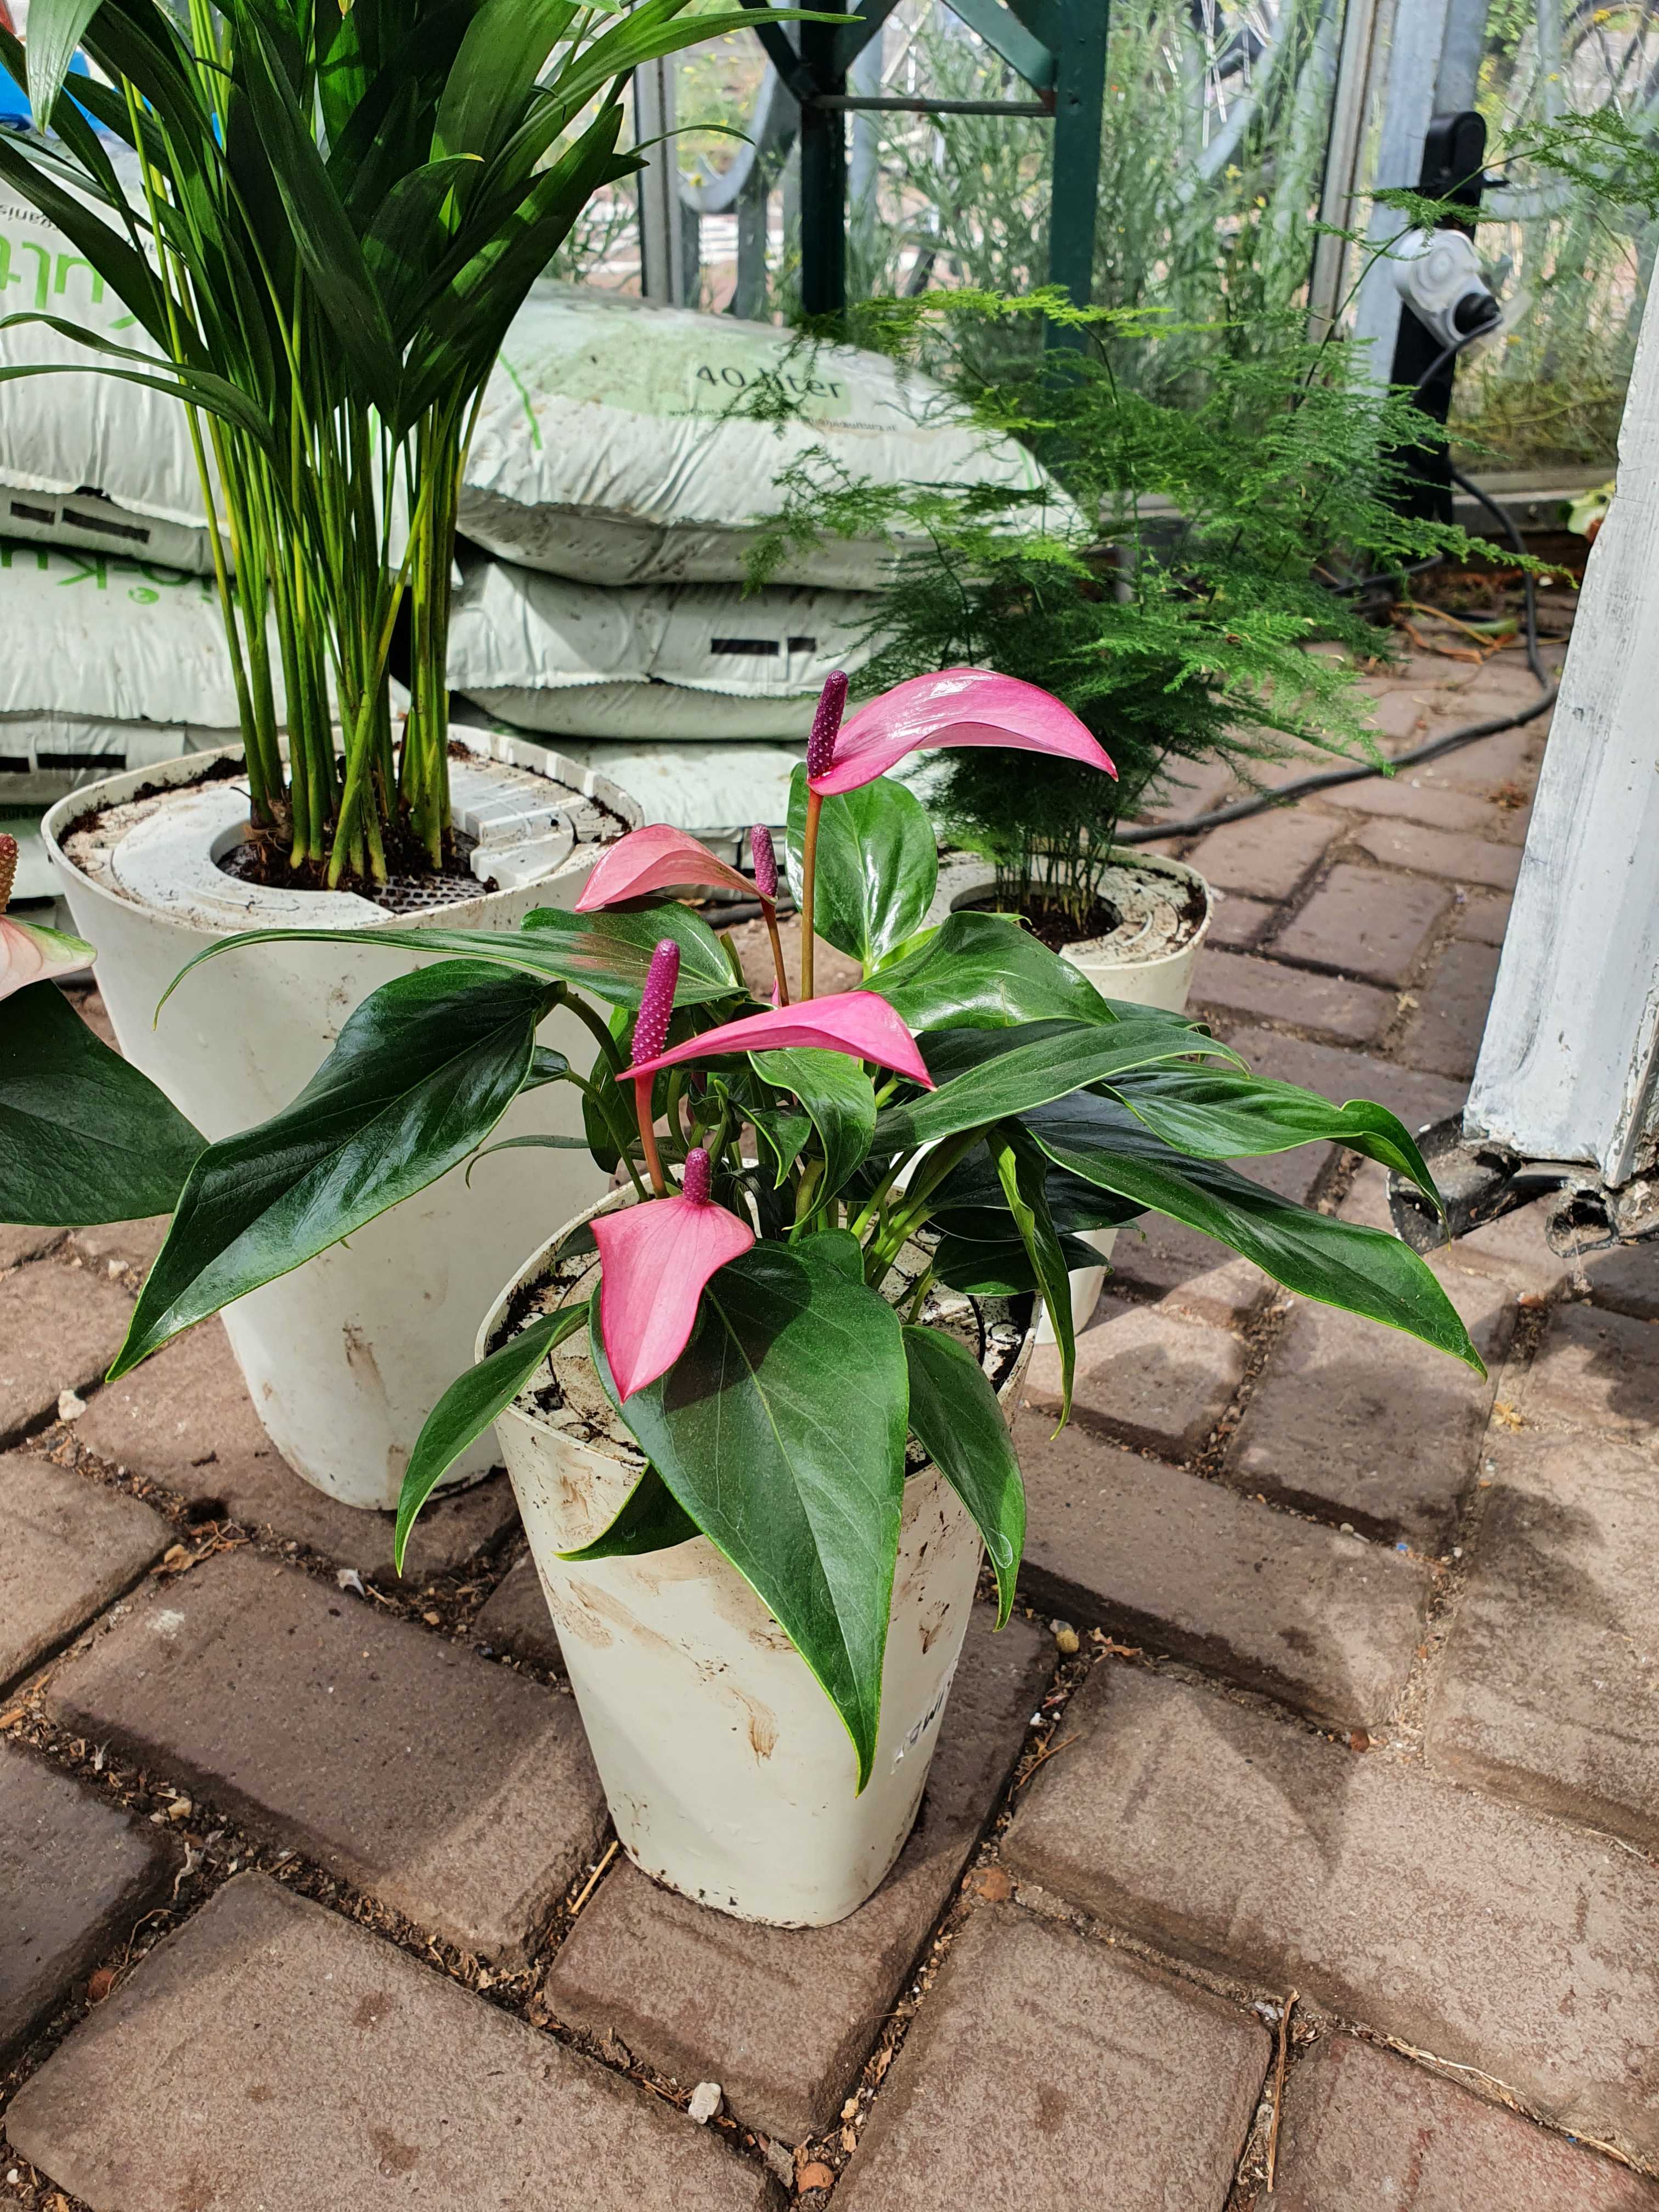
In the office, we have an upside-down plant system that uses Boskke pots (the so-called sky hangers). Recently, we renewed the office plant collection (by adding Monsteras, Anthuriums, Areca palms, and ferns to the existing collection of Hoyas and Philodendrons). Thus, the office plants should be in a great state, and the only thing they currently require is watering every 2 weeks. You know best that the plants require watering by checking the green 'stick' that is in the bottom of the pot: if the stick is up, that means there is water storage within the pot (making the stick raise), if the stick is down, then the plant wants water! You can also always fertilize the plants in the summer (with Bokashi juice).

