Why should we use it?
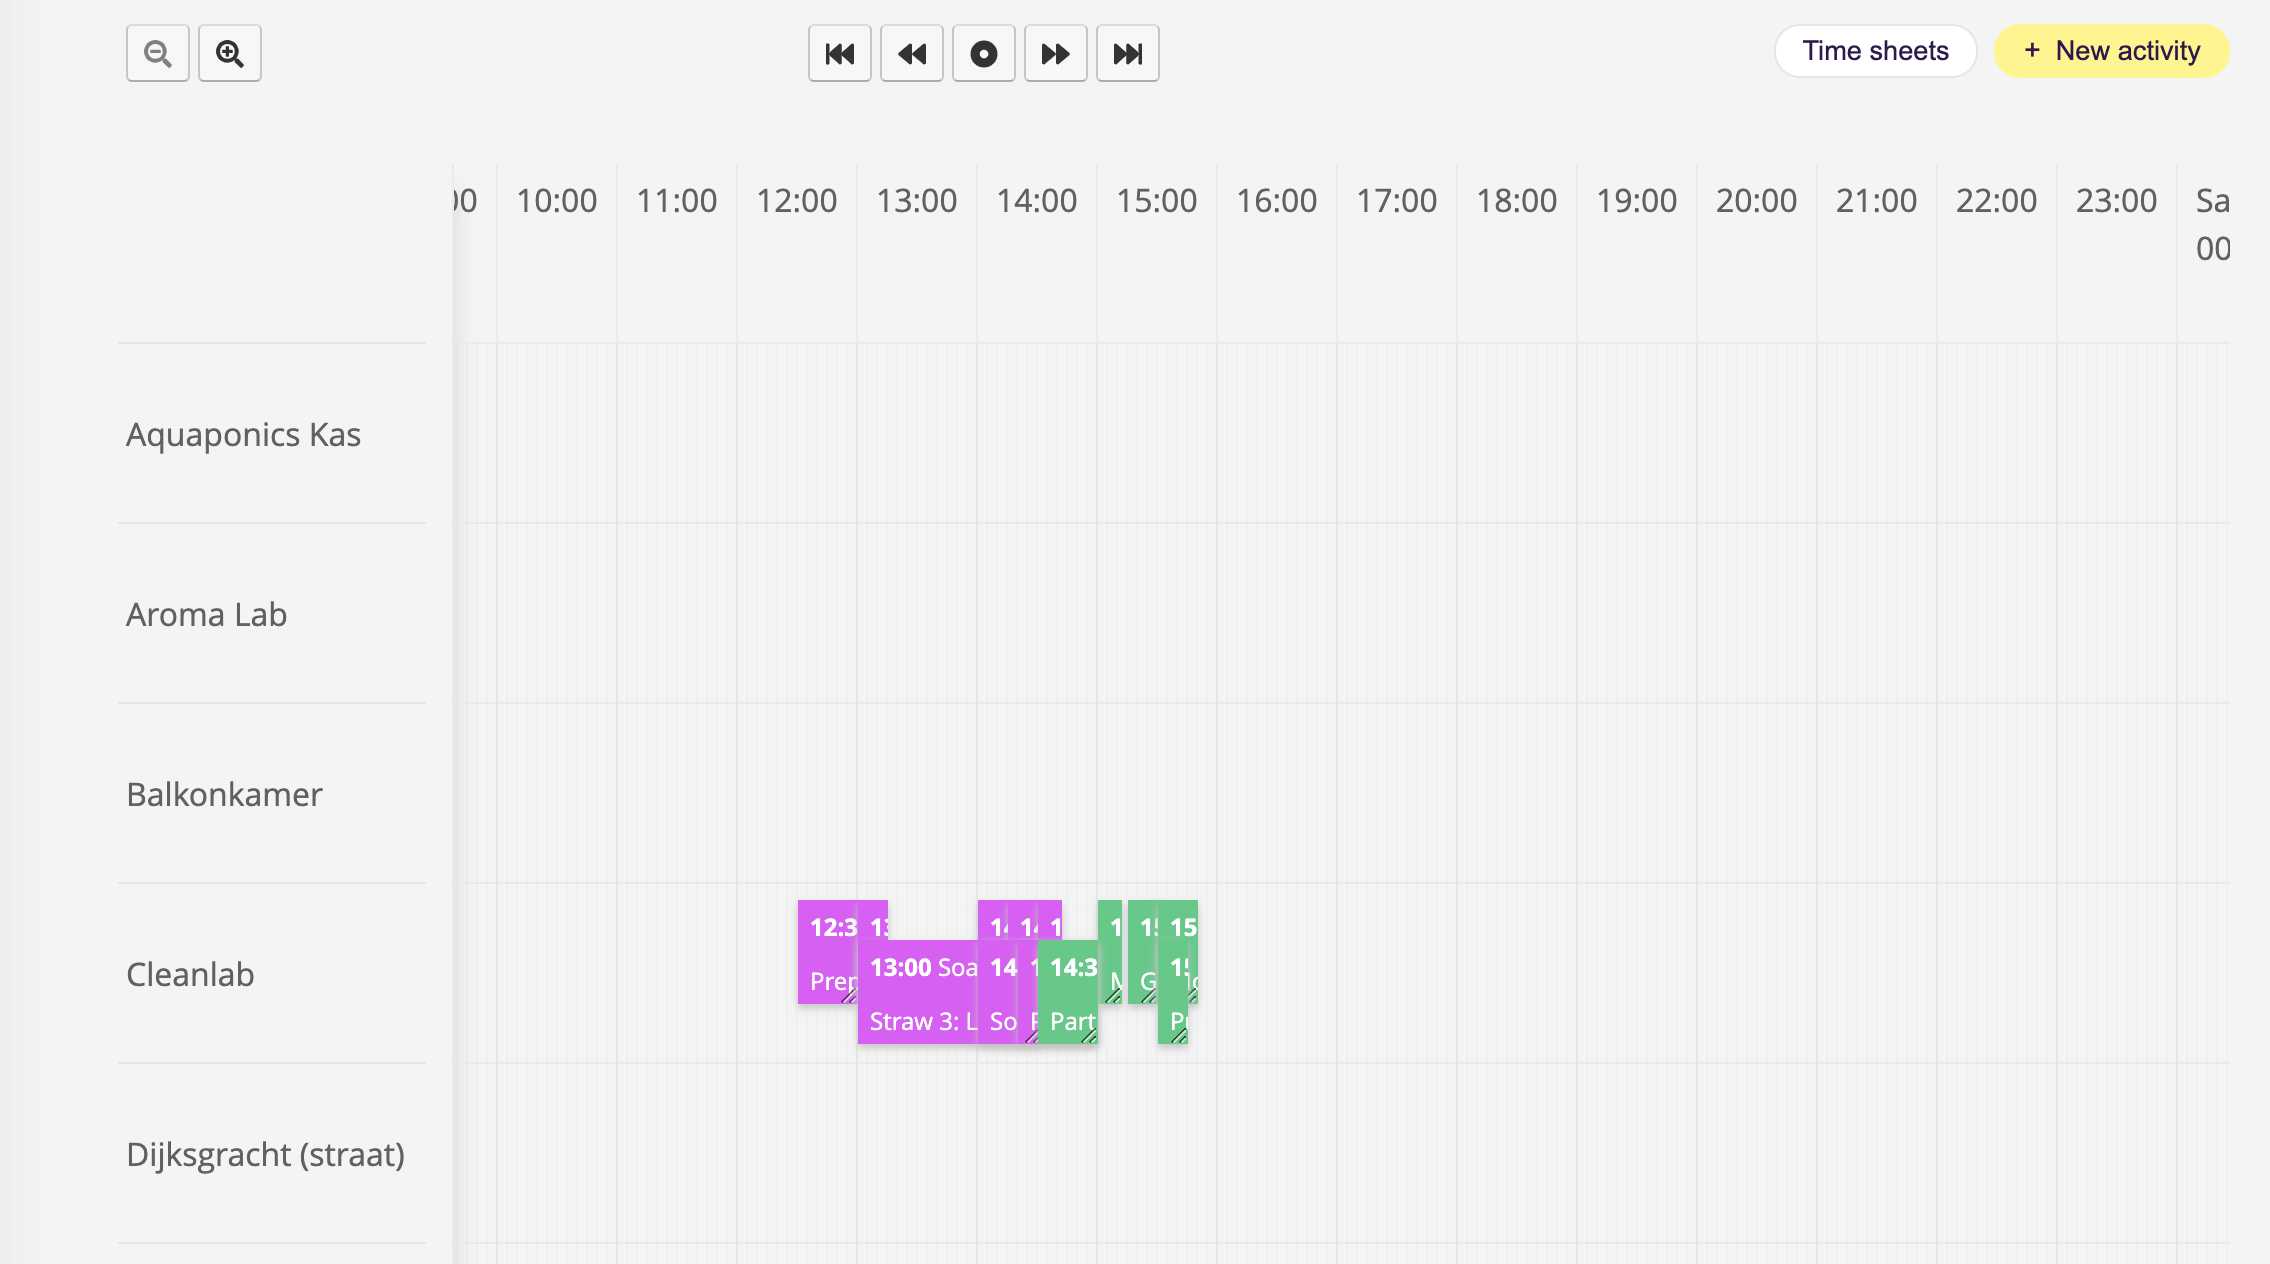
What makes this feature useful is that it goes from this:

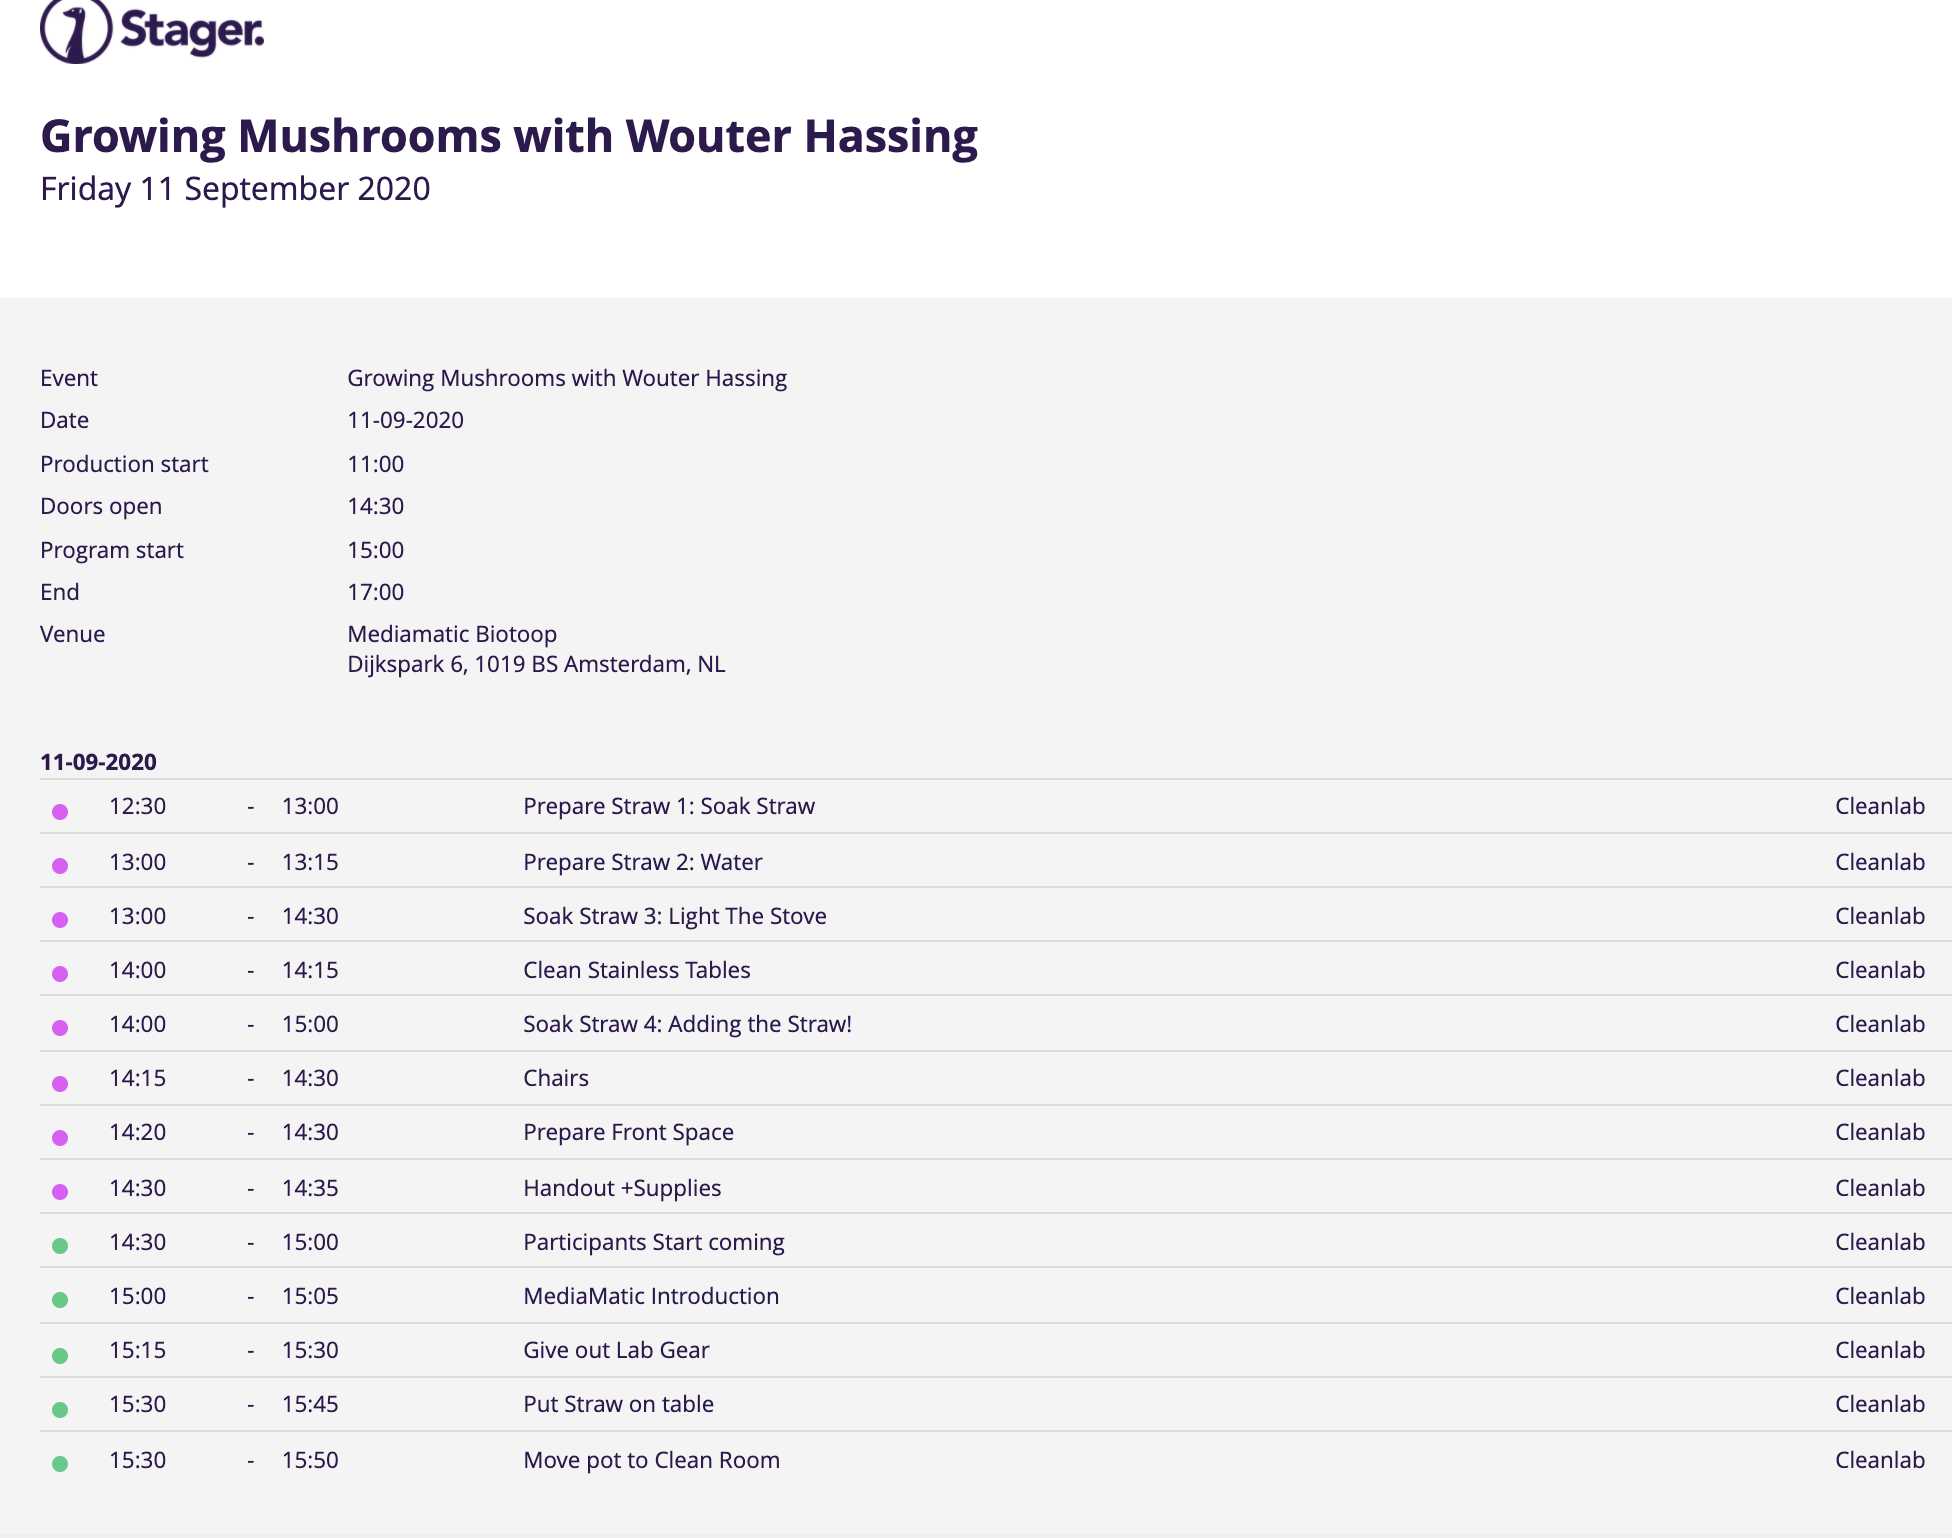
To this:

Which gives you a better overview of your event, plus when printed out can serve as a useful handout/checklist for the employees and event manager.
This overview is also available on the Stager phone app under Timeline! So people can very easily keep track of what they have to do without wasting paper (printing). If you add people as "users" they can even sort it from the app to show just their activities (timeline->chose event-> click right down yellow square->Only Show My activities. Making it easier to delegate tasks. Or even sort per space, so for example restaurant staff can sort per space to see just the activities that will happen inside the restaurant.
How:
So to start up, you go to Stager ->Events->Click on your event ->Timeline
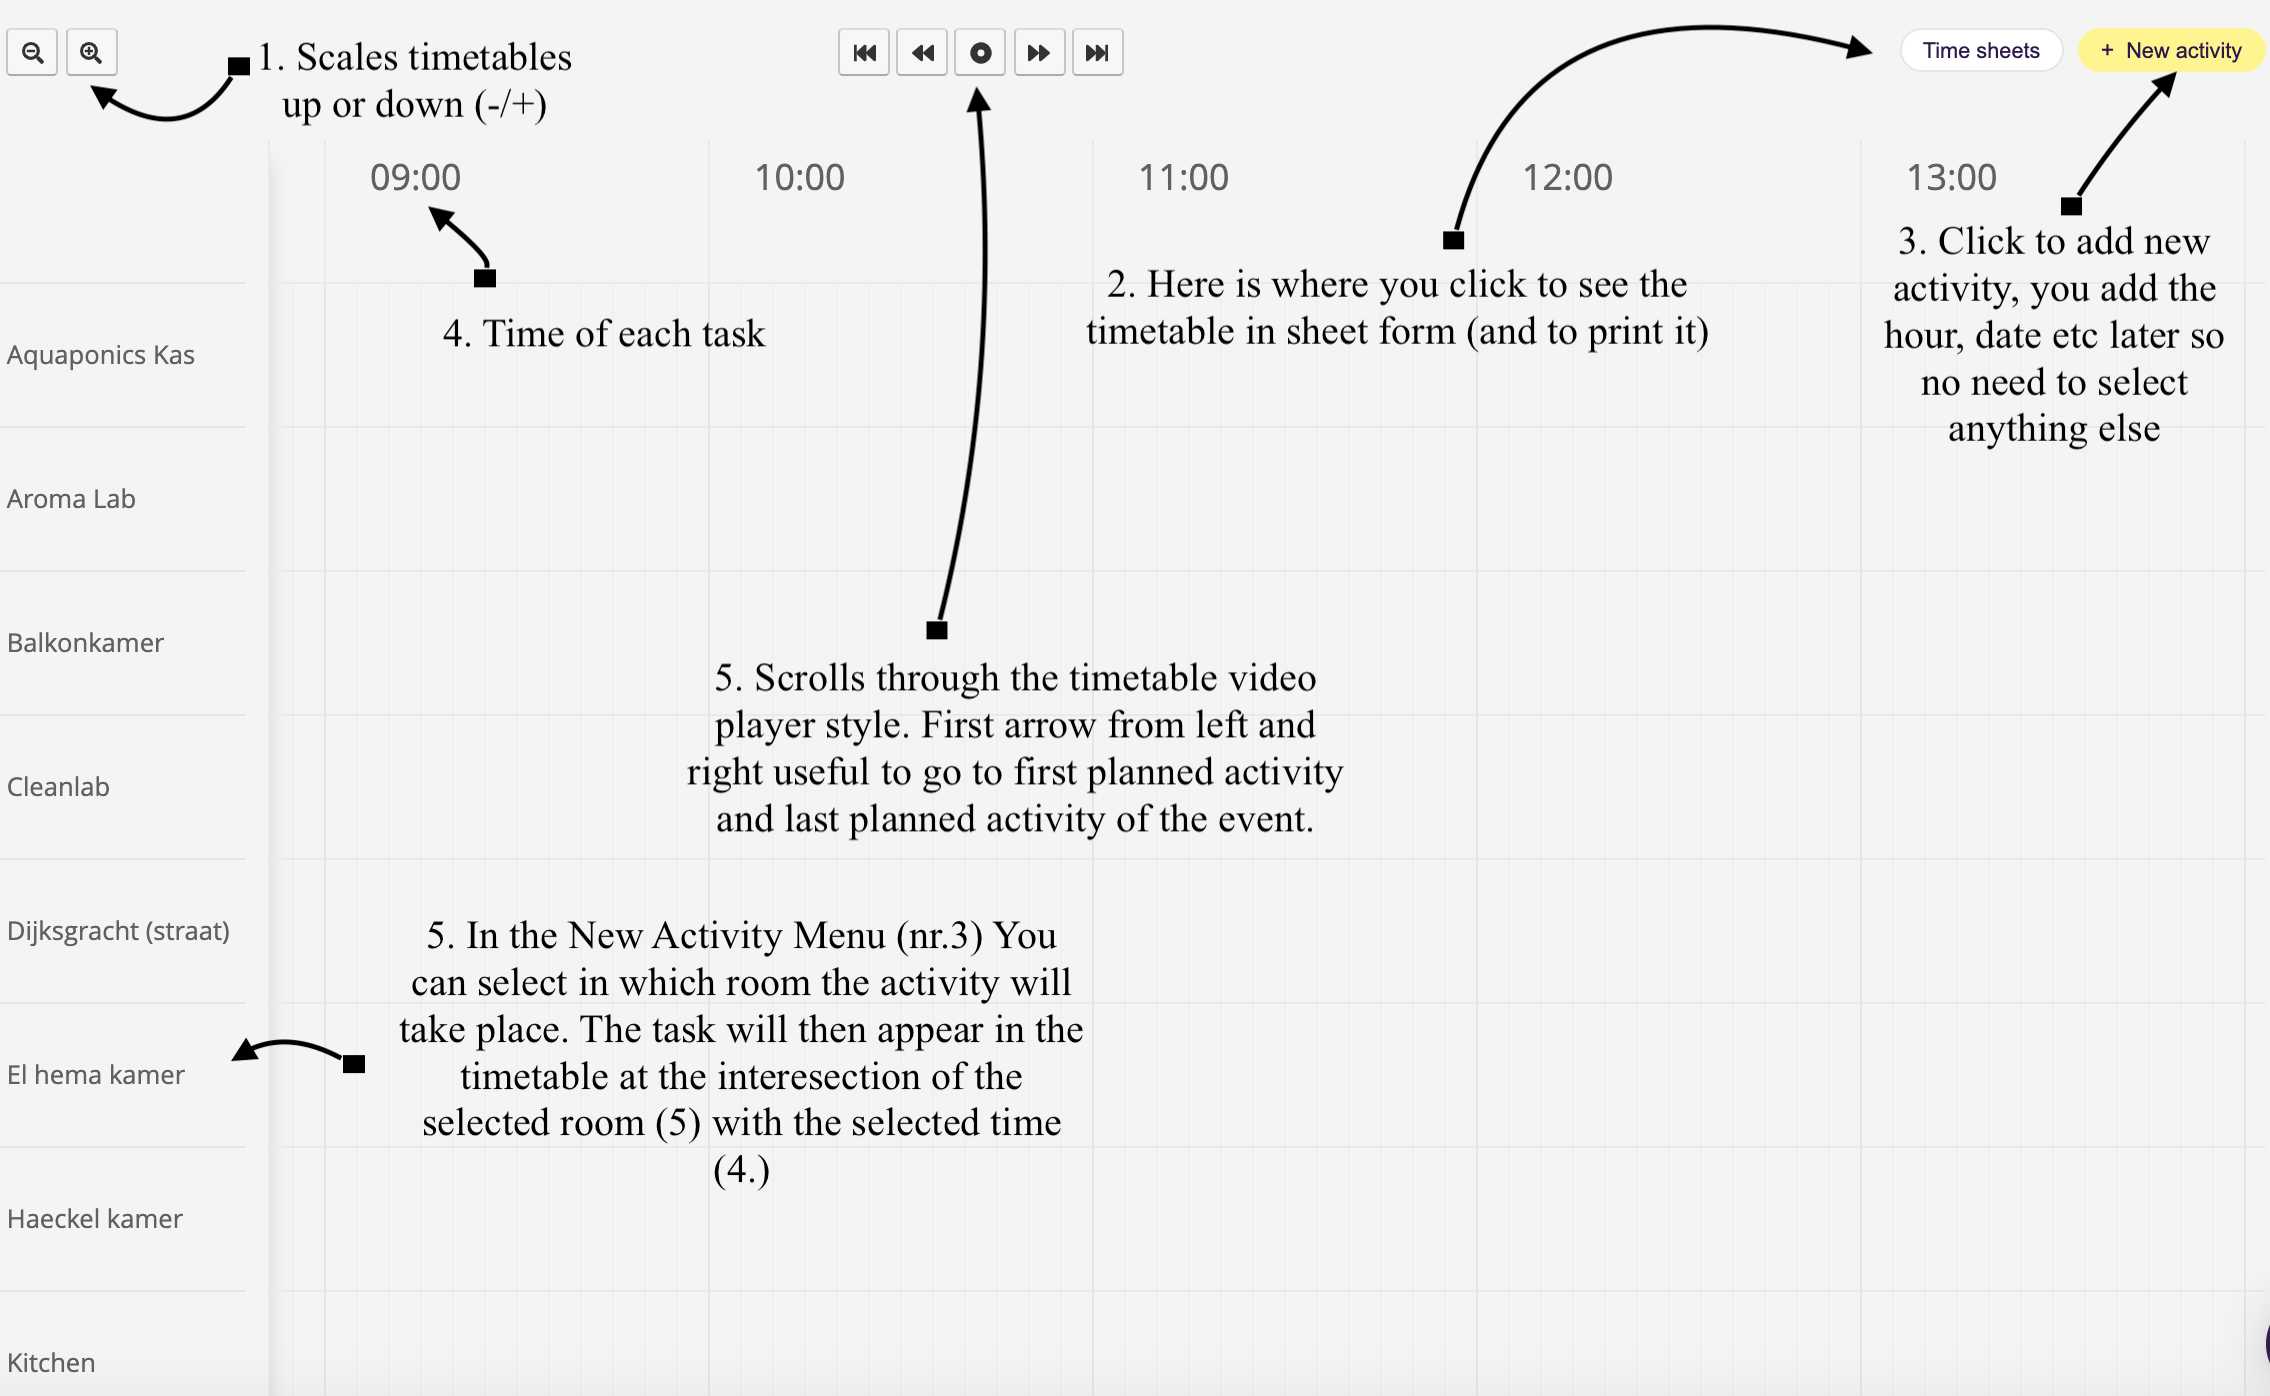
An overview of what everything on the page does:
So to start you click on the up right corner +New Activity (3), and add the activity title, select date, time and location (all Mediamatic rooms can be selected from the drop-down menu). In the notes you can put extra details if needed. The timetable sheet can later be printed in two versions with notes and without notes.
You repeat this process for all the activities, think things such as table preparation times, arrival of guests, first course etc.
You can also set color codes per activity, so for example activities that need to be done by one person could have a specific color, or preparation activities can have a different color than during the event.
Once you are done adding all activities, you can press the Time Sheets button (2). There you can chose to open the timetable for just a specific room (chose all activities for a complete overview) and whatever you want to see it with notes or without. The timesheet will appear and you can click on the right up corner of the page (or ⌘+P) to print it. If you did use color coding, make sure you print it color else the dots will not show at all.